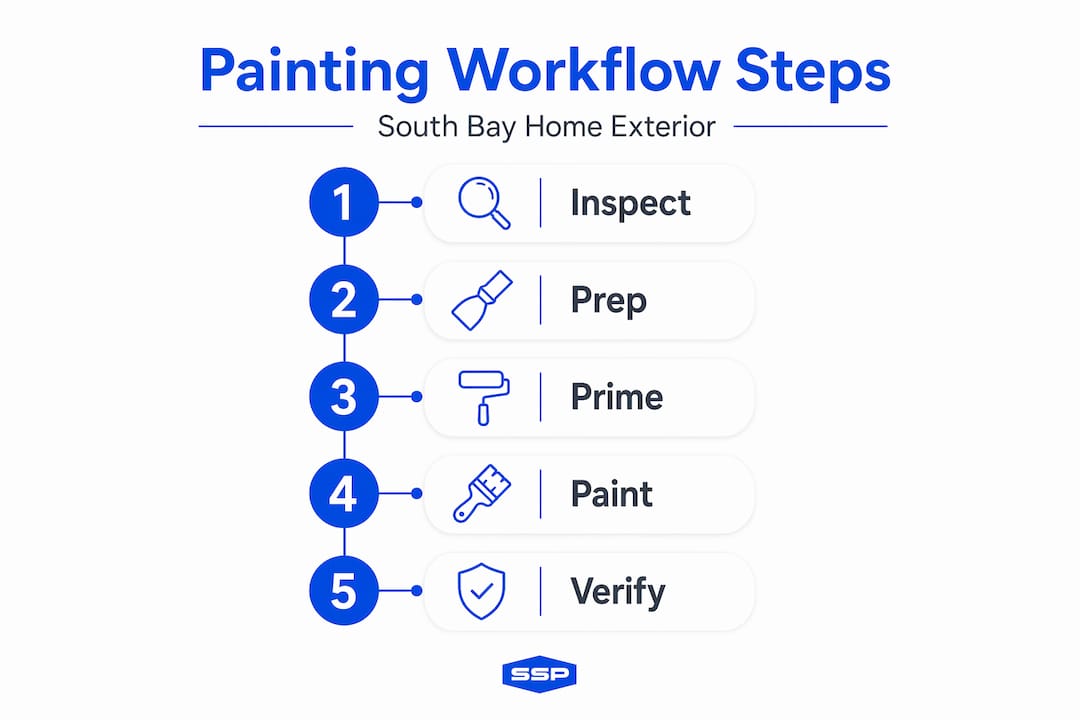
Exterior paint that starts peeling within two years is almost always a workflow problem, not a paint quality problem. For homeowners and property managers in South Bay, CA, where coastal humidity can silently undermine even well-intentioned paint jobs, following a disciplined exterior painting workflow is the difference between a finish that lasts a decade and one that needs attention within two years. This guide walks through every stage of that process, from initial inspection through final verification, with specific attention to the environmental and regulatory factors that make South Bay projects unique.
Table of Contents
- The exterior painting workflow that protects your South Bay home
- Preparing surfaces: cleaning, scraping, sanding, and repairs
- Priming and painting: application order and techniques for a lasting finish
- Timing and environmental factors unique to South Bay
- Final inspection, common mistakes, and verification for quality results
- A South Bay insider's view: why workflow discipline beats shortcuts
- Connect with South Shore Painting for trusted exterior paint services
- Frequently asked questions
Key Takeaways
| Point | Details |
|---|---|
| Thorough inspection | Carefully inspect and address damage before starting to ensure a solid painting foundation. |
| Proper surface prep | Clean, dry, scrape, sand, and repair surfaces thoroughly to maximize paint adhesion and longevity. |
| Targeted priming | Apply primer only to bare or problem areas to enhance durability and reduce costs. |
| Paint sequence | Work top to bottom and do trim before siding to avoid drips and achieve smooth finish. |
| Environmental timing | Schedule painting during dry, mild weather and allow adequate drying and curing times, especially for South Bay’s humidity. |
The exterior painting workflow that protects your South Bay home
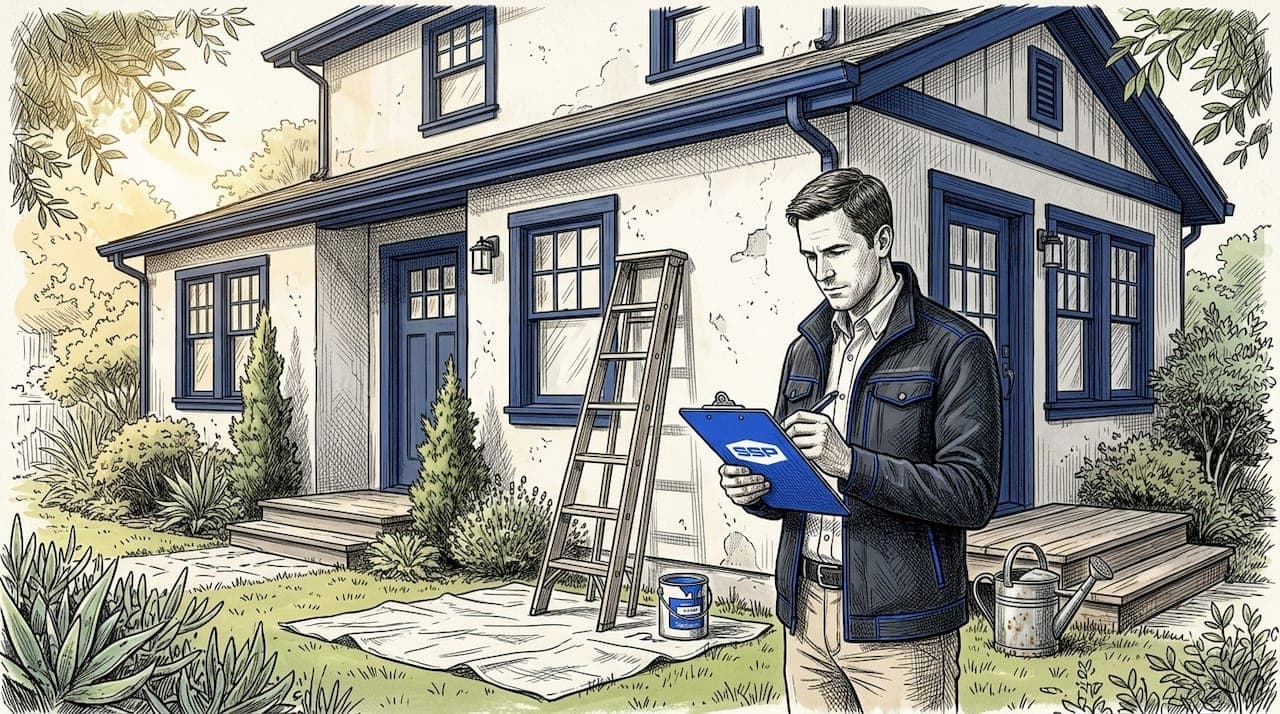
Before a brush touches your siding, the foundation of a successful exterior painting process is understanding exactly what you're working with. A walkthrough inspection is not optional; it's the step that determines your entire project scope, timeline, and budget.
Start by examining the surface for visible damage. Peeling or flaking paint, soft or spongy wood, failed caulk around window and door frames, and water staining are all signs that demand attention before any coating goes on. Skipping this assessment means painting over problems that will resurface, usually within one to two seasons.
Key inspection checkpoints before starting any project:
- Check all siding, trim, fascia, and soffits for rot, swelling, or soft spots
- Look for caulk failure at every joint, corner, and penetration point
- Test moisture content with a pin-type or non-pin moisture meter; wood needs to read below 15% before painting
- Identify areas with mold, mildew, or chalking (a chalky powder on old paint surfaces that signals binder breakdown)
- Look for South Bay weather impact on paint clues, such as consistent moisture damage on north-facing or fog-exposed walls
If your home was built before 1978, lead paint testing is not a step you can skip. Lead-safe work practices are legally required when paint disturbance exceeds 20 square feet on an exterior. That threshold is reached quickly during scraping and prep on even a modest-sized home. Choosing whether to handle this yourself or hire a certified contractor is a decision worth making early. We've seen homeowners underestimate this requirement and run into both safety risks and legal liability. If you're unsure how to evaluate contractors for compliance and quality, reviewing guidance on choosing professional painters is a worthwhile starting point.
Pro Tip: Use a moisture meter rather than relying on "it looks dry." In South Bay, surfaces can appear dry while still holding moisture below the threshold safe for painting, especially on wood siding shaded by eaves or landscaping.
Preparing surfaces: cleaning, scraping, sanding, and repairs
With a clear view of your project needs, the next step is preparing your surfaces properly to create a solid base for paint adhesion. No amount of high-end paint compensates for poor surface prep. This is where most DIY and budget paint jobs fail.
Follow this surface preparation sequence:
- Pressure wash the entire exterior from top to bottom to remove dirt, mildew, algae, and chalking. A pressure washer at 1,500 to 2,000 PSI delivers enough force to clean without damaging wood siding or lifting intact paint. Work downward in consistent strokes.
- Wait for complete drying. This is where patience pays off. Surfaces need a minimum of 24 to 48 hours of drying time after washing before any work continues. South Bay humidity can push that timeline to three days or longer, particularly for wood siding and north-facing walls that see less direct sun.
- Scrape all loose and peeling paint with a quality scraper. Any paint that does not adhere firmly needs to come off completely. Partial scraping leaves an uneven base that telegraphs through your finish coats.
- Sand feathered edges smooth using 80-grit sandpaper to create a gradual, flush transition between scraped and intact paint. Without feathering, those edges will show as ridges under your new paint.
- Repair damaged wood with a wood hardener to stabilize soft fibers, then fill voids with a two-part epoxy wood filler. For severely rotted boards, replacement is the more reliable fix.
- Caulk all gaps and cracks with a paintable, flexible, exterior-grade caulk. Pay particular attention to where trim meets siding, around window and door frames, and at any penetrations through the exterior wall.
| Preparation task | Recommended timing | Tools needed |
|---|---|---|
| Pressure washing | At least 48 hours before painting | 1,500 to 2,000 PSI pressure washer |
| Scraping loose paint | After surface is fully dry | Carbide scraper, 6-inch and 3-inch blades |
| Feathering edges | Same day as scraping | 80-grit sandpaper or sanding block |
| Wood repair | 24 hours before primer | Wood hardener, two-part epoxy filler |
| Caulking | 12 to 24 hours before primer | Paintable exterior caulk, caulk gun |
Pro Tip: On weathered South Bay exteriors, run your hand across the surface after washing and drying. If white powder transfers to your palm, the old paint is still chalking and needs a second pass with a chemical cleaner or deglossing scrub before you proceed.
Priming and painting: application order and techniques for a lasting finish
With surfaces prepped, let's move on to priming and painting properly to achieve a professional, durable finish. The order and method of application matters more than most homeowners expect, and small shortcuts here can add years of wear to the finish.
Priming the right areas, not every area:
Prime bare wood and problem areas rather than coating the entire surface. This is a common point of confusion. If existing paint is sound, clean, and well-adhered, a quality topcoat bonds to it effectively. But wherever you've scraped down to bare wood or made epoxy repairs, primer is non-negotiable. It seals the substrate, provides a consistent base, and ensures the topcoat adheres evenly. Applying primer indiscriminately to the whole house wastes material and rarely improves adhesion over intact existing paint.
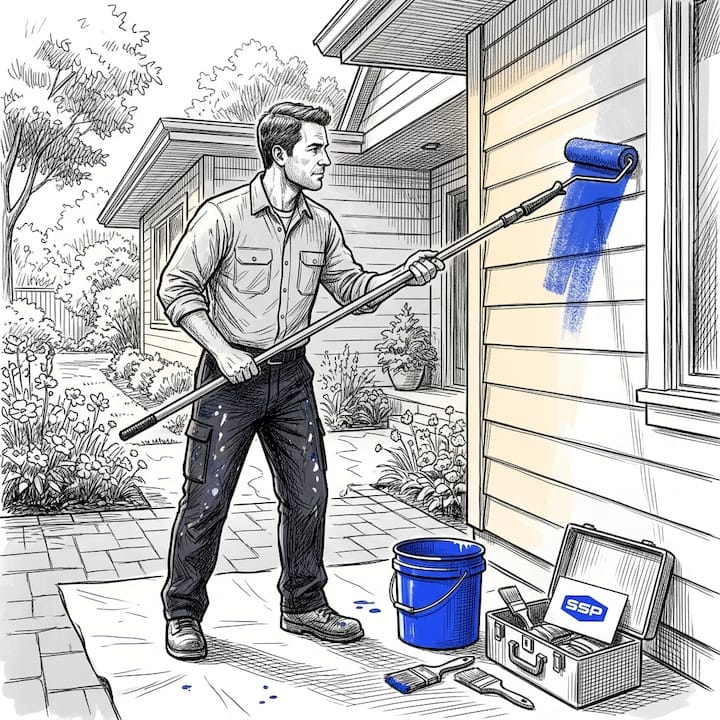
The correct painting order from top to bottom:
- Start with soffits and eaves. Paint the underside overhangs first. Drips from this work will fall onto unpainted surfaces below and won't contaminate finished areas.
- Move to fascia and trim. Cut in all trim, window and door casings, and corner boards with a quality angled brush before any siding work begins.
- Paint doors, windows, and shutters next. These detail areas require precise brush work that is easier to execute before your roller or sprayer gets involved.
- Apply finish coats to the siding last, working in manageable sections from top to bottom to catch any drips as you go.
The top-to-bottom painting sequence from soffits through trim and down to siding is how professionals eliminate the problem of drips landing on already-painted surfaces, which requires rework that eats into both time and material budgets.
Application technique matters, too:
- Maintain a "wet edge" while rolling or brushing siding by working quickly enough that each new stroke overlaps wet paint, not dry. Letting paint set before overlapping creates visible lap marks that are nearly impossible to fix after the fact.
- Apply two finish coats, allowing each to dry to the manufacturer's specified recoat time before adding the next. Do not rush this.
- Adjust for temperature and humidity. On cooler, more humid South Bay mornings, drying times extend. Pushing a second coat too early traps moisture under the film.
Pro Tip: When spraying large siding areas, back-roll each section immediately after spraying using a 3/8-inch nap roller. This technique forces paint into the wood grain for superior adhesion and a finish that holds up significantly longer under coastal conditions. Additional guidance is available on the South Shore Painting blog and in resources for South Bay property managers.
Timing and environmental factors unique to South Bay
Understanding your environment's impact on paint behavior helps you schedule and execute your project with maximum results. South Bay's coastal position creates a specific set of conditions that most general painting guides do not address.
Paint dries most reliably between 50 and 85°F, with humidity as a secondary variable. High humidity slows the evaporation of water from latex paint, which extends both dry time and full cure time. In practical terms, this means that a paint job completed on a foggy South Bay morning behaves very differently from the same paint applied on a clear afternoon.
Timing and environmental checkpoints for South Bay projects:
- Schedule painting to start mid-morning, after dew has evaporated but before late-afternoon winds pick up debris
- Avoid painting on foggy days or immediately following rain; the surface may appear dry while still holding absorbed moisture
- In humid conditions, wood siding may require 3 to 5 days of drying time following pressure washing before painting can safely proceed
- Use an infrared thermometer to check surface temperature directly. Air temperature and surface temperature can differ by 10 to 15 degrees, and surface temperature is what matters for adhesion
- After painting, protect fresh coats from overnight dew or morning fog using breathable drop cloths or plastic sheeting held away from the surface to allow airflow
The South Bay coastal climate rewards painters who plan around weather windows rather than forcing the job to fit a fixed schedule. A one-day delay to let a surface fully dry pays dividends that last years.
Pro Tip: Check the hourly forecast, not just the daily forecast. In South Bay, mornings can be foggy and humid while afternoons are dry and clear. Starting application at 11 a.m. rather than 8 a.m. can make a meaningful difference in how the first coat adheres.
Final inspection, common mistakes, and verification for quality results
When your paint is applied, a thorough final inspection and avoiding pitfalls lock in lasting, professional results. Rushing this stage is one of the most common errors we see, even on otherwise well-executed projects.
"Skipping or rushing prep causes most premature paint failures; ensuring all steps are verified is essential." — Exterior painting preparation guide
Final verification checklist:
- Confirm no areas of loose or missed paint remain, particularly in hard-to-see spots like undersides of trim and soffits
- Check that all caulk lines are fully cured and show no cracking or pulling away from the surface
- Verify primer coverage is adequate everywhere bare wood or repairs were identified during prep
- Look for holidays (small missed areas) in the finish coats by viewing the surface at a low angle in good light
- Allow full cure time before rain exposure; most exterior latex paints require 24 hours before light rain and 48 to 72 hours before heavy exposure
Common mistakes to avoid include painting over surfaces that tested below 15% moisture but were only checked in one spot. Moisture varies by wall exposure and shading. Another frequent error is applying a second coat before the first is fully dry, which traps solvents and leads to wrinkling or adhesion failure weeks later. Knowing what affects exterior paint longevity helps you understand why each verification step protects the investment you've made.
Pro Tip: Walk the perimeter with a flashlight at a low angle in the evening after your final coat. Raking light reveals imperfections like brush marks, runs, and holidays that disappear under direct daylight.
A South Bay insider's view: why workflow discipline beats shortcuts
We've assessed hundreds of failed paint jobs in South Bay, and the pattern is consistent. The failures rarely trace back to paint quality. They trace back to compressed timelines and skipped steps, usually driven by a contractor pricing to win a job rather than pricing to do it right.
Moisture management deserves particular emphasis here. The instinct on a cloudy South Bay morning is to push forward and paint while it's cool, because the air feels comfortable. But that overcast sky often means relative humidity is elevated well above what promotes proper film formation. A surface that feels dry to the touch can still hold enough moisture to cause blistering within months. The only protection against this is measuring, not guessing.
Priming only bare and problem areas is not about cutting corners on material; it is the technically correct approach. Priming over sound existing paint can actually reduce adhesion in some cases by introducing an additional layer that the topcoat needs to bond through. Professionals who understand the full painting workflow apply primer where it builds adhesion, not where it provides psychological reassurance that "more is more."
The top-to-bottom painting sequence sounds obvious on paper, but it requires discipline on multi-story homes where painters naturally tend to work in the area most accessible from their current ladder position. A single drip on finished trim or siding costs time to correct and often leaves a visible mark even after correction. The sequence exists for a reason, and following it without exception is what separates a professional finish from one that just looks professional at first glance.
Patience on prep consistently delivers decade-long finishes. Rushed projects consistently produce two-to-three-year failures. That math is straightforward, and it's the reason we never apologize for the time our prep takes.
Connect with South Shore Painting for trusted exterior paint services
If this guide has shown you anything, it's that a durable exterior finish is built before the paint is ever opened. Every step from moisture testing to caulking to correct primer placement contributes to a result that holds up under South Bay's coastal conditions year after year. Applying this workflow correctly requires the right tools, experience, and a willingness to invest time where shortcuts are tempting.

South Shore Painting brings that discipline to every project. Our crews are experienced with South Bay's specific climate challenges, lead-safe compliance requirements, and the prep standards that produce finishes built to last. Whether you're a homeowner refreshing a single-family home or a property manager coordinating multiple units, we bring the workflow expertise that protects your investment. Read what past clients have shared on our reviews page or explore our blog for additional guidance on exterior and interior painting.
Frequently asked questions
How long does it typically take to paint a 1,500 sq ft single-story home's exterior?
A thorough exterior paint job on a 1,500 sq ft single-story home typically requires 2 to 3 full days, accounting for preparation, priming problem areas, and applying two finish coats. Weather and surface condition can extend that timeline.
What is the importance of waiting after pressure washing before painting?
Waiting a minimum of 24 to 48 hours after pressure washing allows the surface to dry fully, preventing trapped moisture that causes blistering and peeling. In South Bay's humid conditions, surfaces should dry 24 to 48 hours at minimum, and often longer for wood siding.
When is lead-safe work required during exterior painting?
Lead-safe work practices apply to any home built before 1978 when more than 20 square feet of exterior painted surface is disturbed. The EPA RRP rule covers scraping, sanding, or demolition work that breaks or disturbs that surface area.
How does South Bay climate affect exterior painting workflow?
Coastal humidity and morning fog in South Bay frequently extend drying times and require careful scheduling to avoid moisture-related paint failures. South Bay humidity makes mid-morning application windows and moisture testing essential parts of any efficient workflow.
Why is priming only bare or problem areas recommended instead of the entire surface?
Priming only exposed bare wood and repaired areas ensures proper adhesion where it is actually needed and avoids adding unnecessary layers over sound, well-bonded existing paint. Professionals prime bare wood and problem areas to maximize bond strength and avoid material waste without compromising finish quality.