

Paint sheen is the amount of light a dried paint film reflects, and that single variable shapes how a color looks, how well a surface cleans, and how long the finish lasts. For most homeowners, three quick picks cover the majority of jobs:
- Living rooms, bedrooms, and hallways: Eggshell or satin for a soft, low-luster look that still wipes clean.
- Kitchens, bathrooms, and laundry rooms: Satin or semi-gloss for moisture resistance and easy scrubbing.
- Trim, doors, and cabinets: Semi-gloss or high-gloss for a hard, durable film that holds up to daily contact.
Manufacturers like Sherwin-Williams and KILZ publish detailed sheen selection guides that align with these recommendations. Southshorepaint applies this same framework on every interior and exterior project in the South Bay, CA, pairing the right finish with proper surface prep for results that last.
Table of Contents
- What paint sheen actually means for your walls
- The full sheen spectrum, from flat to high-gloss
- Where to use each sheen, room by room
- How sheen changes the way color looks on your walls
- How to choose the right sheen for your specific project
- Why surface prep and primer determine whether your sheen works
- Key Takeaways
- The sheen mistake most homeowners make
- Get a professional finish that actually lasts
- Useful sources and further reading
What paint sheen actually means for your walls
Paint sheen is measured by how much light bounces off a cured paint surface. The industry uses gloss units (GU) measured at specific angles to classify finishes, though most homeowners simply experience this as the difference between a chalky flat wall and a mirror-like high-gloss door.
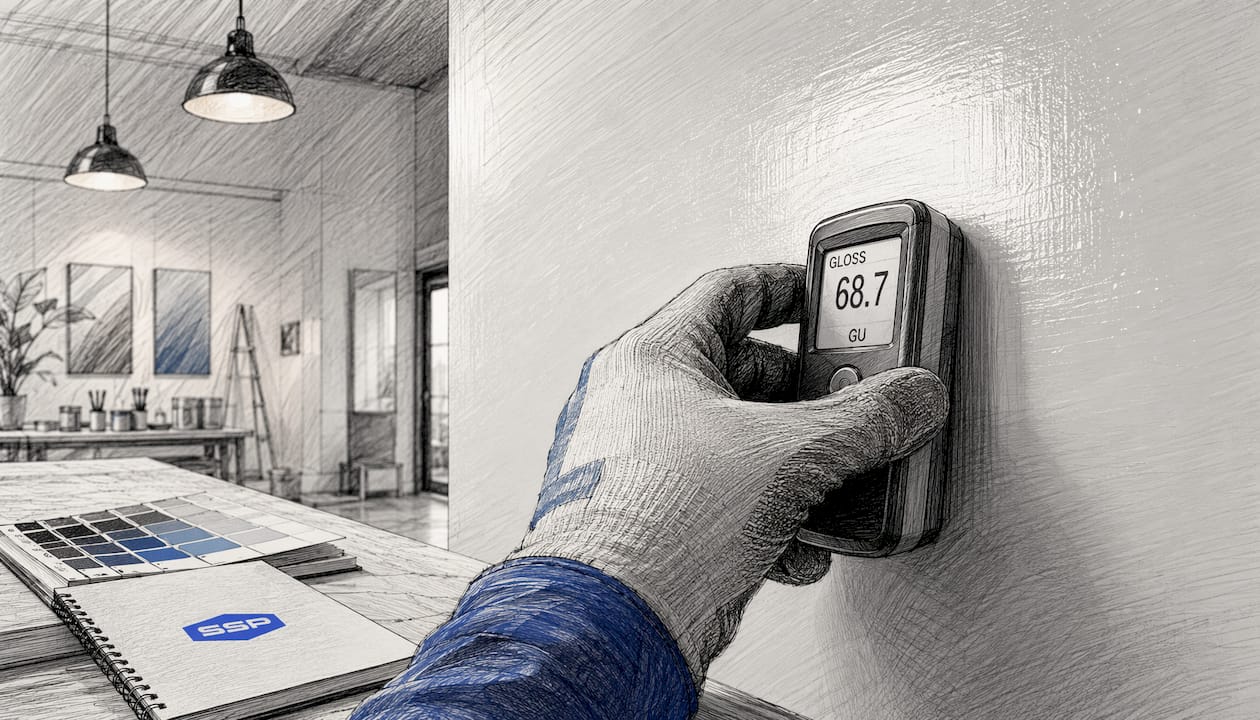
The chemistry behind it is straightforward. Higher concentrations of resin or binder in a paint formula create a smoother, denser film that reflects more light. Flatter finishes rely on a higher pigment load, which scatters light in multiple directions and produces that non-reflective, muted appearance. According to Sherwin-Williams, this binder-to-pigment balance is the primary driver of both sheen level and film durability.
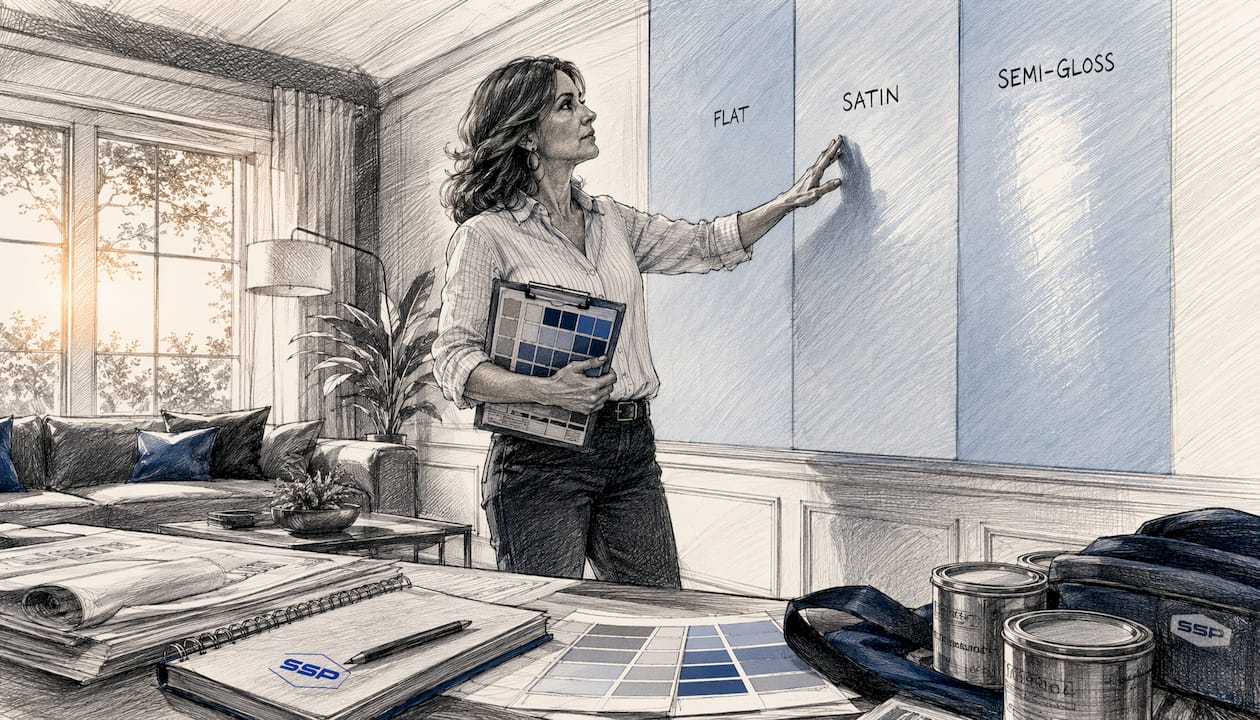
Why does this matter beyond aesthetics? A higher-sheen film is generally tougher, more moisture resistant, and easier to clean because the denser binder creates a harder surface. A flatter finish sacrifices those practical properties in exchange for hiding surface flaws and delivering a softer visual result. Understanding that tradeoff is the foundation of every good sheen decision.
The full sheen spectrum, from flat to high-gloss
The five common sheen levels form a clear progression from the least reflective to the most. Each one occupies a distinct performance niche.
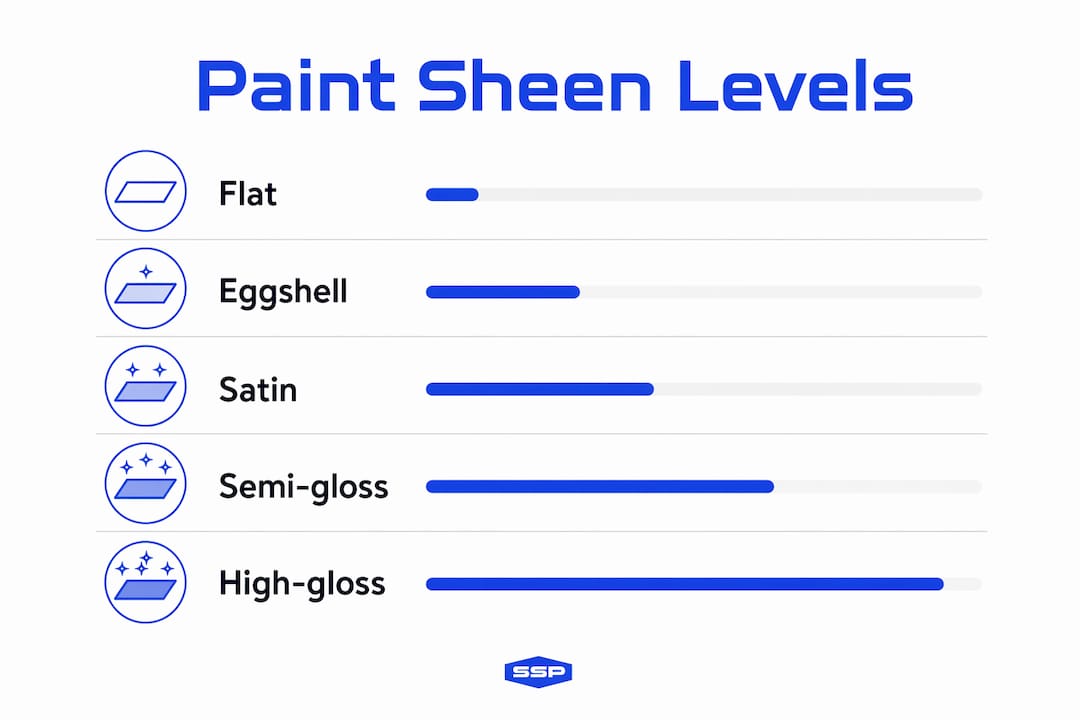
Flat / Matte absorbs nearly all light and delivers a velvety, non-reflective surface. It hides surface imperfections better than any other finish, which makes it the go-to for ceilings and older walls with texture or minor flaws. The tradeoff is durability: flat finishes are the least washable and least resistant to scuffs, so they are not well suited for high-contact surfaces.
Eggshell adds a barely perceptible low luster, similar to the surface of an actual eggshell. It is significantly more washable than flat while still doing a reasonable job of softening the look of minor wall imperfections. Most interior walls in low-to-moderate traffic rooms land here.
Satin sits in the middle of the spectrum with a smooth, pearl-like sheen. It handles moisture and cleaning better than eggshell, which is why Consumer Reports notes it works well in kitchens, dining areas, children's bedrooms, and bathrooms in addition to living spaces. Satin is also tough enough for trim in many applications.
Semi-gloss is noticeably shiny and reflects light in a way that catches the eye. It resists stains well, cleans easily, and holds up to repeated scrubbing. The catch is that it shows surface imperfections clearly, so walls need to be smooth before application. Semi-gloss and high-gloss finishes are the standard recommendation for kitchens, bathrooms, trim, and cabinets.
High-gloss delivers the hardest, most reflective film available in standard interior and exterior paints. It is the most durable and easiest to clean, but it amplifies every surface flaw. High-gloss is typically reserved for doors, cabinetry, and exterior trim where maximum durability matters more than hiding imperfections.
| Sheen level | Best for | Durability & washability | Hides imperfections | Quick pros/cons |
|---|---|---|---|---|
| Flat / Matte | Ceilings, low-traffic walls, textured surfaces | Low | Yes | Hides flaws well; not washable |
| Eggshell | Living rooms, bedrooms, hallways | Moderate | Partially | Soft look; some cleanability |
| Satin | Kitchens, bathrooms, kids' rooms, trim | Good | Partially | Versatile; shows prep flaws |
| Semi-gloss | Trim, doors, cabinets, bathrooms | High | No | Tough and cleanable; shows defects |
| High-gloss | Doors, cabinets, exterior trim | Very high | No | Maximum durability; unforgiving surface |
Some modern premium paints use cross-linking technologies that improve washability even at lower sheen levels. Check the product technical sheets for specific washability claims before assuming flat or eggshell means you cannot clean the wall.
Where to use each sheen, room by room
Matching sheen to the room's function is more reliable than choosing by color or personal preference alone. Here is a practical breakdown:
Interior rooms and surfaces:
- Ceilings: Flat or matte. Ceilings rarely need cleaning, and flat finish hides the minor texture variations that show up under raking light.
- Living rooms and bedrooms: Eggshell or satin. Low traffic, low moisture, and a preference for a softer look make these the right fit.
- Hallways and entryways: Satin. Higher foot traffic means more scuffs and handprints, so the added durability is worth it.
- Kitchens: Satin or semi-gloss. Grease, steam, and frequent wiping demand a finish that can handle repeated cleaning.
- Bathrooms: Semi-gloss. Moisture is the primary concern; semi-gloss resists humidity and wipes down easily.
- Laundry rooms and mudrooms: Semi-gloss for the same reasons as bathrooms.
- Kids' rooms: Satin or semi-gloss. Crayon marks and sticky hands are a given; washability is the priority.
- Trim, doors, and windows (interior): Semi-gloss or high-gloss. These surfaces take the most physical contact and benefit from the hardest film. For interior doors, semi-gloss is the most common professional choice.
- Cabinets: High-gloss or semi-gloss. Cabinets need a film that resists grease and cleans without degrading.
Exterior surfaces:
- Siding: Satin or low-sheen exterior paint. Flat exterior finishes work on older or rougher siding where hiding texture matters, but satin holds up better to weather and cleaning.
- Fascia and trim: Semi-gloss or high-gloss for durability against UV exposure and moisture.
- Exterior doors: High-gloss or semi-gloss. Curb appeal and durability both point toward a higher sheen here.
- Decks: Specialty deck coatings with low sheen are standard; standard interior sheen categories do not apply.
How sheen changes the way color looks on your walls
Sheen does not just affect durability. It actively changes how a color reads in a room. A shinier finish reflects more light, which makes the same paint color appear brighter, more saturated, and sometimes warmer or cooler depending on the light source. According to Benjamin Moore, manufacturers specifically warn that sheen can alter perceived color and depth, which is why testing samples under actual room lighting is critical before committing to a full application.
Higher sheen also amplifies surface texture. A wall with minor dings, roller marks, or uneven patches will look smooth under flat paint and noticeably rough under semi-gloss. This is not a flaw in the paint; it is physics. The more light a surface reflects, the more it reveals what is underneath.
Pro Tip: Paint two or three 2-foot-by-2-foot sample panels in adjacent sheens on the actual wall, label each with the sheen level, and observe them at morning, midday, and evening light. The difference between eggshell and satin can be subtle in a paint chip but obvious on a wall.
For homeowners who want a look that falls between two standard sheen levels, Sherwin-Williams notes that mixing two sheens from the same product line can produce a custom intermediate finish, but consistent mixing ratios and large sample panels are necessary to avoid patchiness.
How to choose the right sheen for your specific project
A short decision checklist prevents most sheen mistakes. Work through these questions before buying:
- How much traffic does this surface get? High-traffic areas (hallways, kids' rooms, kitchens) need satin or higher. Low-traffic spaces (adult bedrooms, formal dining rooms) can use eggshell.
- Is moisture a factor? Bathrooms, kitchens, and laundry rooms need semi-gloss at minimum.
- What condition is the surface in? Rough, patched, or textured walls call for flat or eggshell to minimize how much the finish reveals. Smooth, well-prepped walls can carry satin or semi-gloss without issue.
- How often will you need to clean it? If the answer is frequently, go one sheen level higher than your aesthetic preference suggests.
- Are VOCs a concern? Many modern paints are available in low-VOC or zero-VOC formulas across all sheen levels, which matters especially in bedrooms and rooms with limited ventilation.
- What does the lighting look like? Bright, direct light amplifies sheen. A north-facing room with limited natural light can handle a slightly higher sheen without looking harsh.
Pro Tip: Before purchasing a full gallon, buy sample sizes in two adjacent sheens (for example, eggshell and satin), apply them to 2-foot-by-2-foot panels on the actual wall, and label each clearly. View them at different times of day. This 30-minute step prevents a costly repaint.
For a deeper look at how to paint interior walls with consistent sheen results, Southshorepaint's blog covers the full process from prep to final coat.
Why surface prep and primer determine whether your sheen works
The sheen on the can and the sheen on the wall are only the same if the surface is properly prepared. A porous, unprimed surface absorbs paint unevenly, which softens the intended sheen and creates visible dull spots. According to South Shore Painting's prep guidance, proper surface preparation directly controls final sheen appearance, and skipping it is the most common reason a paint job looks inconsistent even when the right product was used.
Primer serves two functions in this context. It seals porous surfaces so the topcoat lays down uniformly, and it creates a consistent base that helps the paint achieve its labeled sheen. Primer choice can also influence coverage and the final sheen appearance, particularly on new drywall, repaired patches, or previously stained surfaces.
High-gloss and semi-gloss finishes require the most thorough prep. Glossy finishes need additional sanding and priming because they show defects readily. A small ridge from a patched nail hole that disappears under flat paint becomes a visible bump under semi-gloss.
Pro Tip: For most DIY touch-ups, clean the surface, sand lightly with 120-grit sandpaper, spot-prime any bare patches, and let the primer cure fully before applying the topcoat. If you are dealing with water stains, peeling paint over a large area, or moisture damage, those are signs to bring in a professional rather than paint over the problem.
Key Takeaways
Paint sheen is the single most practical decision in any paint project: match reflectivity to the room's traffic, moisture level, and surface condition, and the finish will perform as intended.
| Point | Details |
|---|---|
| Sheen = reflected light | Paint sheen measures how much light a dried film reflects, affecting both appearance and durability. |
| Match sheen to function | Use flat/eggshell for low-traffic walls, satin for moderate-use rooms, semi-gloss or high-gloss for kitchens, baths, and trim. |
| Higher sheen reveals flaws | Glossier finishes amplify surface imperfections; prep and prime thoroughly before applying semi-gloss or high-gloss. |
| Sample before you commit | Test two adjacent sheens on 2-foot-by-2-foot panels in the actual room and view them at different times of day. |
| Southshorepaint's approach | Southshorepaint pairs the right sheen with proper surface prep on every South Bay project for finishes that hold up long-term. |
The sheen mistake most homeowners make
The most common error is choosing sheen based on the paint chip alone, in a store, under fluorescent lighting. That chip tells you almost nothing about how the finish will read on a 12-foot wall in a room with afternoon sun coming from the west. Sheen interacts with room light in ways that are genuinely hard to predict without testing, and yet most homeowners skip the sample step entirely because it feels like extra work.
The second most common mistake is using flat paint in a kitchen or bathroom because it looks clean and modern in design photos. Those photos are styled under controlled lighting, and the walls are not being wiped down with a damp cloth three times a week. Flat paint in a moisture-prone room will start to show wear within months.
What actually works is treating sheen selection as a functional decision first and an aesthetic one second. Choose the sheen level the surface and the room demand, then pick the color. If the aesthetic result feels too shiny, the answer is better surface prep so you can drop one sheen level without sacrificing cleanability, not choosing a flatter finish and hoping for the best. Southshorepaint's approach of pairing premium materials with thorough prep is precisely what makes it possible to use a slightly lower sheen without losing durability.
Get a professional finish that actually lasts
Choosing the right sheen is only half the equation. The other half is the prep work, the primer, and the application technique that determine whether that finish holds up for years or starts peeling within a season. Southshorepaint specializes in exactly that: premium interior and exterior finishes in the South Bay, CA, built on proper surface preparation, quality materials, and workmanship that does not cut corners.
Whether the project is a full interior repaint, cabinet refinishing, trim work, or exterior siding, the team at Southshorepaint matches the right finish to the surface and the environment, not just what looks good on a chip.

Ready to get a finish that performs as well as it looks? Request a quote from Southshorepaint and get a professional assessment of your surfaces, sheen options, and prep needs before a single drop of paint goes on the wall.
Useful sources and further reading
These manufacturer and professional resources are worth bookmarking for technical data and deeper guidance:
- Sherwin-Williams Paint Sheen Guide: The most detailed manufacturer resource for sheen definitions, binder/pigment explanations, and room-by-room recommendations. Start here for product-specific technical data.
- KILZ Primer and Paint Resources: Useful for primer selection guidance, particularly for stain-blocking and surface prep before applying any sheen level.
- Consumer Reports Paint Finish Guide: Independent testing-based recommendations on sheen performance and low-VOC options across product lines.
- Benjamin Moore: How to Choose a Paint Finish: Strong on color-sheen interaction and sampling advice.
- True Value: Pick the Best Paint Sheen for Every Job: Practical, accessible breakdown of sheen tradeoffs for DIY projects.
- Southshorepaint Blog: Applied homeowner guides on finishes, prep, and painting best practices specific to South Bay, CA conditions, including a complete guide to paint finishes and guidance on choosing high-quality paint.