Getting a painting estimate should be straightforward. In practice, it rarely is. Vague line items, delayed responses, and scopes that shift after the crew arrives are the norm for many homeowners and property managers. A clearly defined painting estimate workflow changes that. It creates a structured path from first contact to signed contract, giving you reliable numbers, accurate timelines, and zero surprises. This guide walks you through every stage of that process so you can approach your next painting project with clarity and full financial confidence.
Table of Contents
- Key takeaways
- Building your painting estimate workflow from the start
- Step-by-step process for creating a solid painting estimate
- Common challenges in the estimate workflow
- Validating your estimate before signing
- My perspective on what a good estimate actually reveals
- See how Southshorepaint approaches your estimate
- FAQ
Key takeaways
| Point | Details |
|---|---|
| Preparation drives accuracy | Surface assessments and accurate measurements before estimation prevent costly scope surprises later. |
| Itemized bids protect your budget | Estimates separating prep and application phases help you compare bids and control project costs. |
| Speed signals professionalism | Bids delivered within 24 hours reflect contractor organization and improve your planning timeline. |
| Technology reduces errors | Digital takeoff tools can cut bid preparation time significantly while improving calculation accuracy. |
| Follow-up seals understanding | Structured follow-up communication after the estimate keeps questions answered and decisions moving. |
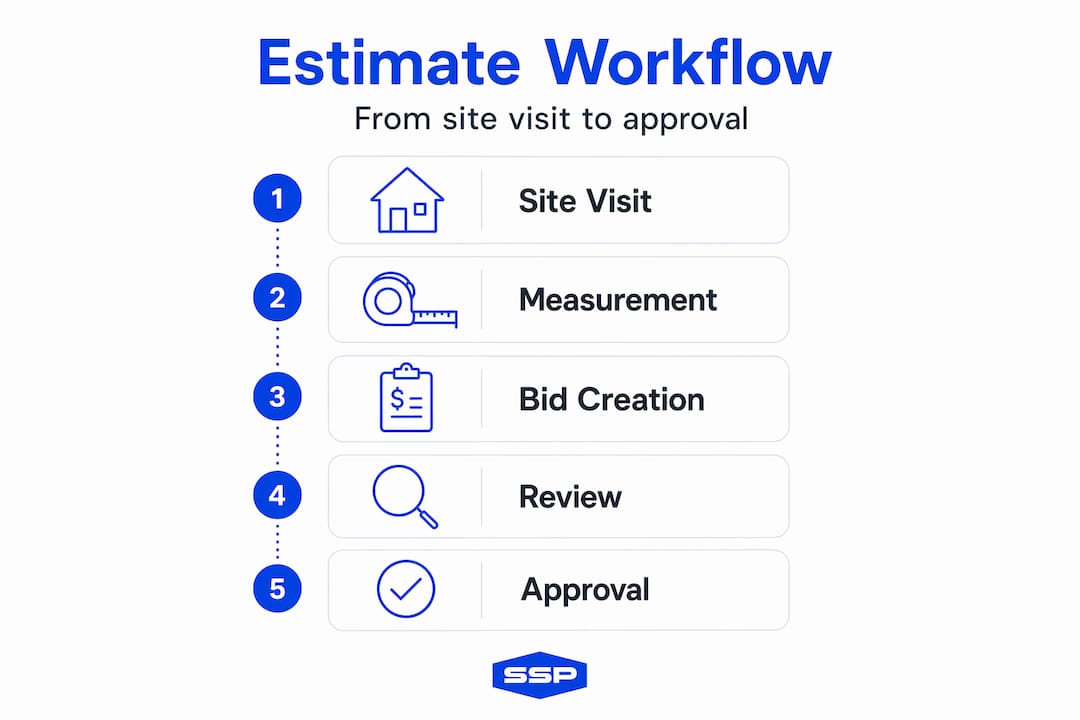
Building your painting estimate workflow from the start
Before a single number appears on an estimate, the groundwork you lay determines how accurate that number will be. This is the phase most homeowners skip, and it is exactly where cost surprises are born.
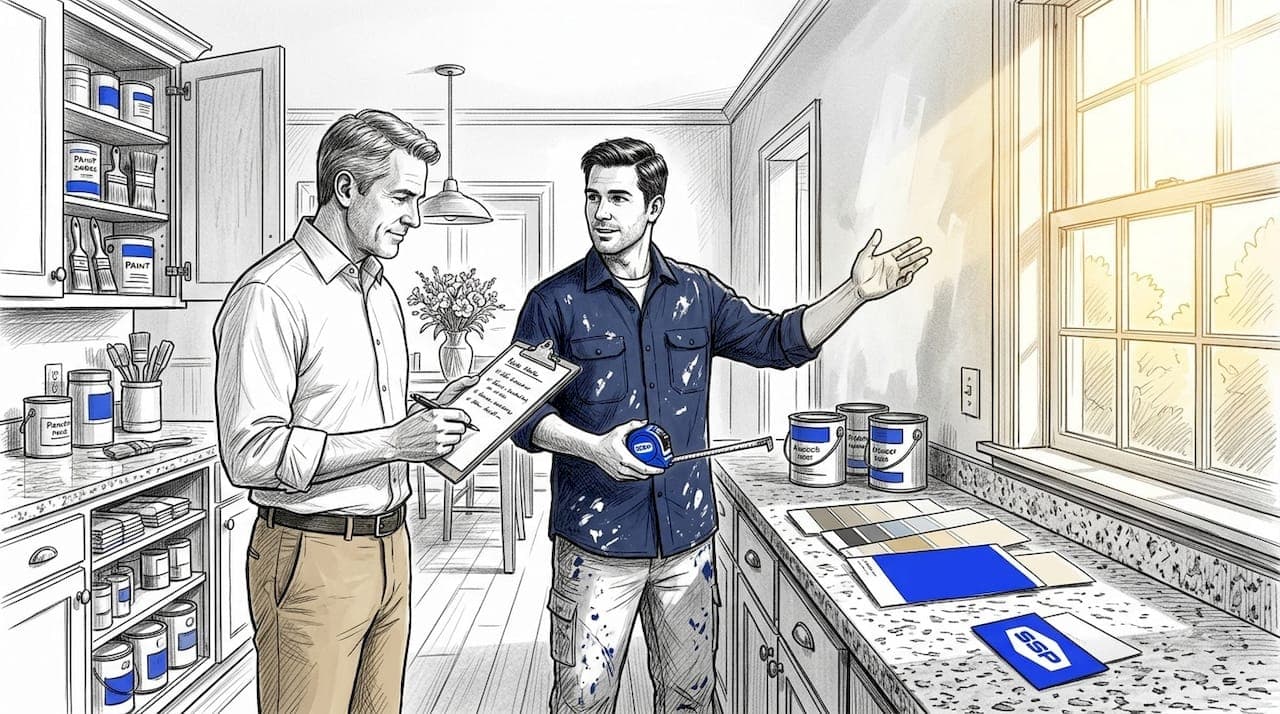
The site visit is non-negotiable
A professional painting estimate begins with a physical site visit. There is no shortcut here. No-cost estimates allow contractors to identify drywall repairs, power washing requirements, and surface conditions that directly affect scope and pricing before a contract is ever signed. This protects both parties. If a contractor quotes your project without walking the space, treat that as a warning sign.
Measuring the right way
Professional estimators calculate based on wall surface area, not floor square footage. That distinction matters more than most homeowners realize. Surface area calculations subtract door and window openings, which can meaningfully reduce the total paintable surface in rooms with large windows or multiple doorways. A living room might have 1,200 square feet of floor area but only 850 square feet of paintable wall surface once openings are removed.
Paint coverage rates around 350 to 400 sq ft per gallon are the industry standard for planning purposes, though drywall texture, surface porosity, and sheen level all affect real-world consumption. Labor is the largest cost variable in any interior painting budget, and adding a 10 to 20 percent contingency on top of materials and labor is standard practice for realistic painting project budgeting.
Here is a quick overview of the core inputs every accurate estimate requires:
| Input | What to Gather | Why It Matters |
|---|---|---|
| Wall surface area | Measured wall square footage minus openings | Determines paint quantity and labor hours |
| Surface condition | Cracks, stains, water damage, texture | Drives prep cost and timeline |
| Prep requirements | Drywall repair, power washing, priming | Separate cost line from application |
| Paint specifications | Sheen, brand, number of coats | Affects materials cost and coverage |
| Room accessibility | Ceiling height, furniture, obstacles | Affects labor rate and time |
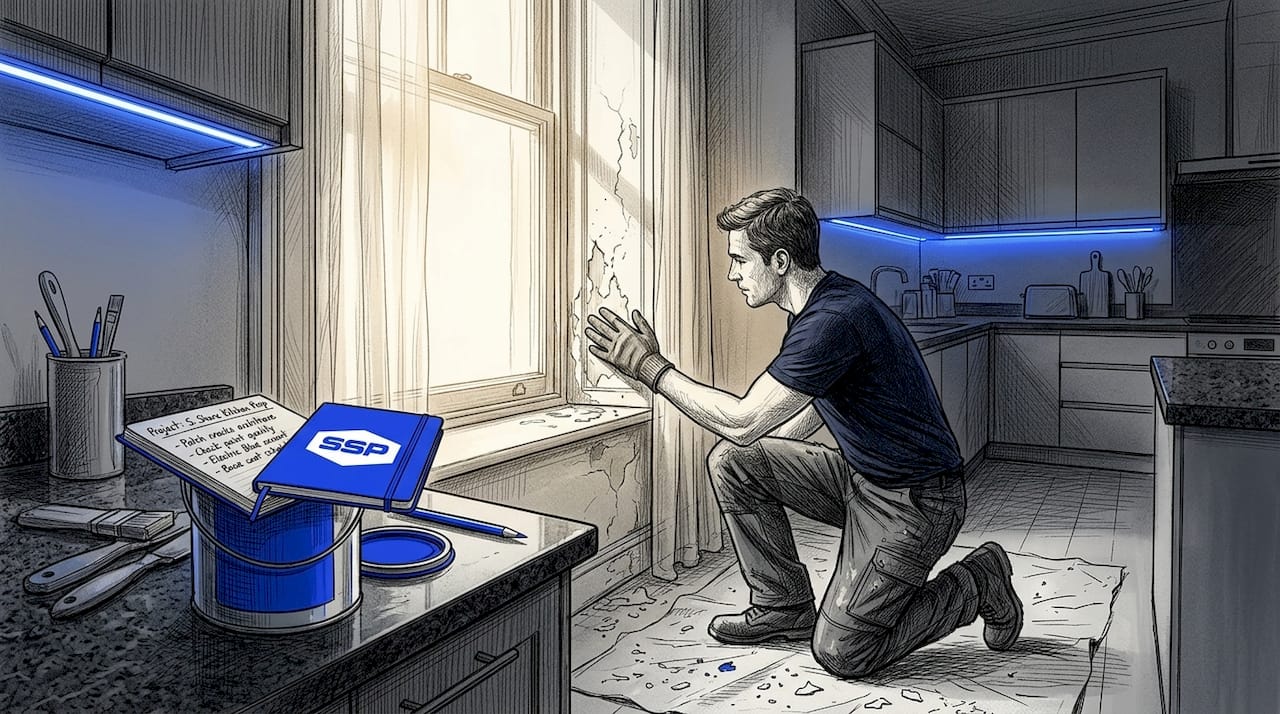
- Photograph every surface condition before the estimator arrives so you have a baseline record.
- Note any previous paint problems: peeling, bubbling, or bleed-through stains each require specific prep protocols.
- Ask about primer requirements separately. Primer is often omitted from quick quotes and added to the final invoice.
Pro Tip: If your home was built before 1978, disclose that upfront. Lead paint regulations affect prep methods and disposal requirements, which directly impact cost.
Step-by-step process for creating a solid painting estimate
With preparation complete, the estimation process itself follows a clear sequence. Understanding each step helps you evaluate the quality of the bids you receive.
-
Digital takeoff and measurement verification. Contractors using digital estimating software can reduce bid calculation time by up to 95 percent compared to manual methods. These tools pull precise measurements and auto-calculate material quantities, which reduces transcription errors that plague hand-calculated bids.
-
Building the itemized bid. A properly structured bid separates prep work, primer application, finish coats, labor hours, and materials into distinct line items. Itemized pricing separating prep and application prevents surprise costs after the crew arrives. If you receive a single lump-sum number with no breakdown, that estimate cannot be verified or compared accurately against other bids.
-
Adding a contingency buffer. Responsible estimates include a 10 to 20 percent contingency for unforeseen surface conditions. This is not padding. It is honest acknowledgment that surfaces can hide damage until prep begins.
-
Delivering the estimate promptly. Bids sent same-day or within 24 hours after a site walk-through positively impact signing rates because they reflect contractor organization and keep your decision timeline clean. If a contractor takes five days to send a quote, that pace often reflects how communication will go throughout the project.
-
Structured follow-up messaging. A professional estimate management process does not stop at delivery. Follow-up schedules that include a 24-hour recap, a 72-hour color consult or financing conversation, and a 7-day decision check-in demonstrate that the contractor is organized and attentive.
-
Test-patch evaluation for color confirmation. Before finalizing color decisions in the estimate, a contractor should paint 12x12 inch test patches on the actual wall surface near trim. Sample boards are notoriously misleading. Real wall patches evaluated in morning light, afternoon light, and evening light give you accurate color representation before gallons are ordered.
Here is how manual and software-assisted workflows compare:
| Workflow Type | Bid Time | Error Rate | Follow-up Capability | Cost Accuracy |
|---|---|---|---|---|
| Manual estimation | Several hours to days | Higher risk of calculation errors | Typically informal | Good with experience |
| Software-assisted | Minutes to 1 hour | Significantly reduced | Automated and scheduled | Consistently high |
Pro Tip: Ask every contractor whether their estimate includes a written scope narrative, not just numbers. A scope narrative defines what "prep" means specifically: does it include filling nail holes, sanding glossy surfaces, spot priming? The details in that language protect you.
Common challenges in the estimate workflow
Even a well-structured workflow for painting quotes runs into complications. Knowing the most frequent trouble spots helps you address them before they become costly disagreements.
Unexpected surface damage
The most common post-estimate surprise is surface damage found during prep. Contractors who operate with discipline handle this through a formal change order process. Any work that was not in the original scope requires a written change order with a price before the work proceeds. If a contractor mentions extra work verbally and bills for it later, that is a process failure.
Scope creep without documentation
Scope creep happens when small additions accumulate without written approval. Clear itemized scopes listing prep and painting phases help property managers control costs by making it easy to approve or decline individual line items. Without that structure, "while we're at it" conversations quietly inflate your final invoice.
"An estimate without a written scope is not a financial document. It is an opening offer."
Labor rate confusion
Labor rates vary significantly by region, crew size, and project complexity. When comparing bids, a lower labor rate is not automatically better. A faster, more experienced crew at a higher rate often completes the job in fewer hours, closing the total cost gap. Review estimated labor hours, not just rate per hour, to understand what you are actually comparing.
Common mistakes to avoid during estimate review:
- Accepting a lump-sum bid without requesting line-item breakdown.
- Comparing bids without confirming they specify the same paint brand, sheen, and number of coats.
- Overlooking whether primer is included or listed as an optional add-on.
- Failing to ask specifically what surface conditions could trigger a change order.
- Signing a contract before seeing a written scope that defines prep work in detail.
Pro Tip: When reviewing competing bids, build a simple comparison grid with columns for prep scope, paint brand and sheen, number of coats, labor hours, and contingency. This makes true differences visible immediately.
Validating your estimate before signing
Receiving an estimate is only half the job. Using it effectively as a planning tool requires deliberate review before you commit.
Start by verifying that the assumptions behind every number are explicitly stated in writing. What paint brand is specified? How many coats? Does the prep scope include caulking? These are not details to clarify after signing. A thorough estimate acts as a financial blueprint, clearly defining scope, deliverables, and assumptions in a way that prevents budget overruns.
Use the itemized pricing to benchmark competing bids accurately. Understanding painting cost factors including labor, materials, and contingency allowances helps you identify when a low bid is leaving something out versus when a contractor is genuinely more efficient.
Before signing, work through this checklist:
- Confirm the scope narrative lists specific prep tasks, not just "prep and paint."
- Verify paint quantities are calculated by wall surface area, not floor area.
- Check that primer is included where the surface condition requires it.
- Review the payment schedule to confirm milestones align with project phases.
- Confirm the estimate includes a process for written change orders.
- Photograph all test patches and save them alongside the final estimate documents.
A follow-up consultation after receiving the estimate is worth scheduling even if you feel satisfied with the numbers. Color decisions made during that conversation, combined with documented test patches, reduce mid-project changes that disrupt your timeline and budget.
My perspective on what a good estimate actually reveals
I have reviewed enough painting estimates to know that the document itself tells you far more than the price. The way an estimate is structured reveals how a contractor thinks about your project.
An estimate that lists a single number for "labor and materials" is not really an estimate. It is a placeholder. The contractors I have seen deliver the best results are the ones who spend time on the estimate because they understand that a thorough estimate builds client confidence and reduces the chance of conflict mid-project. They are not in a hurry to hand you a number. They want you to understand exactly what you are purchasing.
The test-patch step is the one most clients push back on because it feels slow. But I have seen color disasters that added thousands of dollars to a project because the homeowner approved a shade from a sample board in a paint store under fluorescent lighting. A 12x12 inch patch on your actual wall, evaluated over a full day, costs nothing and saves real money.
My honest take on software tools is that they improve consistency and speed, but they do not replace an estimator who has seen how surfaces actually behave. A digital takeoff tool is only as good as the inputs from the person doing the site walk. The exterior painting workflow follows the same principle. Technology is a tool. Experience is what makes the estimate trustworthy.
If a contractor cannot explain every line item on their estimate clearly, and in plain terms, that is the answer you needed before you even asked about the price.
— Ryan
See how Southshorepaint approaches your estimate
At Southshorepaint, every project starts with a detailed site assessment and an itemized bid that separates prep, primer, and finish application into clear line items. We do not send ballpark numbers from a parking lot. We measure properly, document surface conditions, and deliver your estimate promptly so your project planning can move forward without delay.

From initial walk-through to follow-up color consultations, the process is built around transparency and workmanship that holds up long after the paint dries. If you are a homeowner or property manager ready to work with a painting contractor whose estimate reflects the actual project, not just an opening number, visit Southshorepaint to request your free consultation. You can also explore cost-saving painting tips on the Southshorepaint blog to prepare for your upcoming project.
FAQ
What does a painting estimate workflow include?
A painting estimate workflow covers site visit, surface measurement, itemized bid creation, prompt delivery, and structured follow-up. Each step builds toward an accurate, transparent quote you can plan around.
How long should a painting estimate take to receive?
A professional contractor should deliver a detailed estimate same-day or within 24 hours of the site walk-through. Same-day bid delivery reflects contractor organization and keeps your decision timeline intact.
Why should painting estimates be itemized?
Itemized estimates separate prep work, primer, finish coats, and labor so you can verify what is included and compare bids accurately. Without itemization, unexpected costs often surface after the crew arrives on-site.
What is a contingency buffer in a painting estimate?
A contingency buffer is typically 10 to 20 percent added to account for unforeseen surface conditions discovered during prep. It is a built-in safeguard, not extra profit, and reflects honest painting project budgeting.
Do I really need a test patch before approving colors?
Yes. Test patches on actual wall surfaces, evaluated under different lighting over 24 hours, are far more reliable than paint store sample boards. Skipping this step is one of the most common reasons painting projects require costly mid-project corrections.