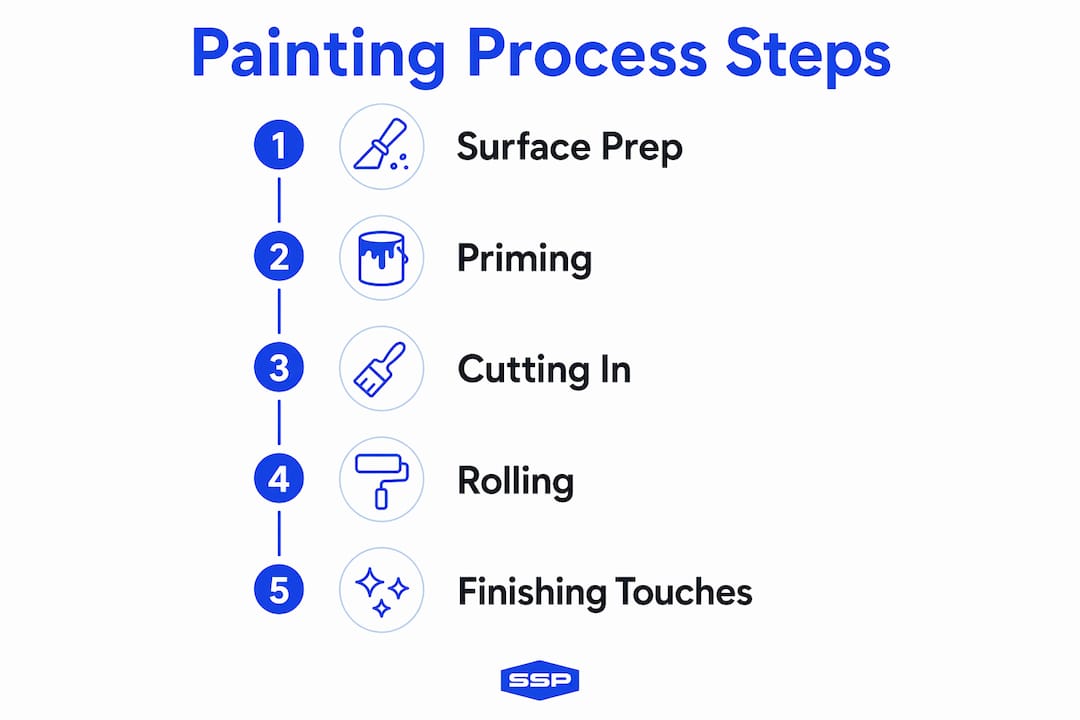
The property painting process is a structured sequence of preparation, priming, painting, and finishing that determines whether a paint job lasts three years or fifteen. For homeowners and property managers in the South Bay area, getting this sequence right matters more than paint brand or color choice. This guide covers every stage of the process, from exterior surface prep through interior wall techniques, material selection, and long-term maintenance. Follow these steps and you protect your investment, improve curb appeal, and avoid the costly rework that comes from skipping fundamentals.
What preparation steps ensure a durable exterior paint job?
Surface preparation is the single most consequential phase of the entire property painting process. Nearly 90% of exterior paint failures trace back to inadequate surface prep, including skipped cleaning, unrepaired damage, and missed priming. That figure means nine out of ten peeling, blistering, or fading paint jobs could have been prevented before a single brush touched the wall.
Follow this sequence for exterior prep:
-
Schedule around weather. Temperatures between 50 and 80°F during dry conditions give paint the best chance to cure properly. In the South Bay, late spring and early fall typically offer the most reliable windows. Painting in direct midday heat or before rain causes adhesion problems that show up within months.
-
Pressure wash the entire surface. Pressure washing removes dirt, mildew, and flaky paint that would otherwise prevent new coats from bonding. Allow the surface to dry completely, typically 24 to 48 hours, before moving forward. Residual moisture trapped under paint is a primary cause of blistering.
-
Inspect for structural damage. Walk the perimeter and look for loose boards, nail pops, wood rot, and gaps around windows and door frames. Soft or spongy wood must be replaced or treated before painting. Nail pops should be countersunk and filled with exterior-grade wood filler.
-
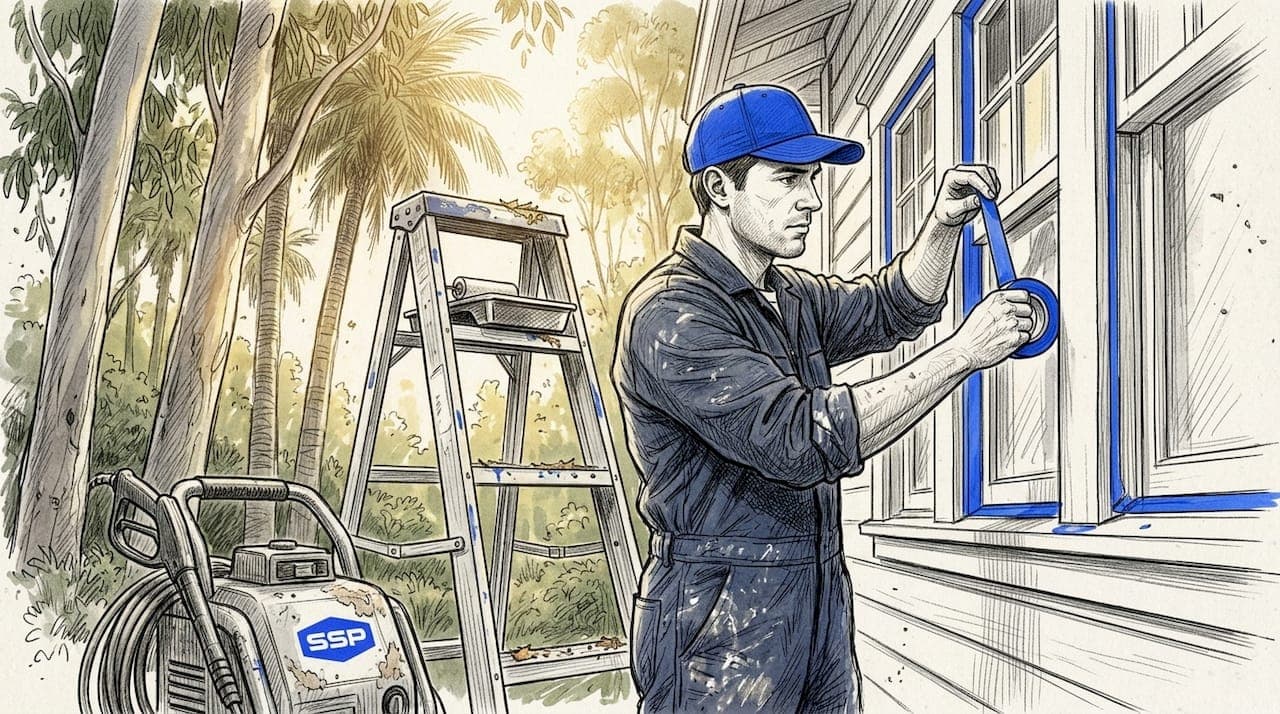
Caulk all gaps and seams. Use a paintable exterior caulk around window frames, trim joints, and any penetrations in the siding. Gaps allow moisture intrusion, which accelerates paint failure and causes wood decay beneath the surface.
-
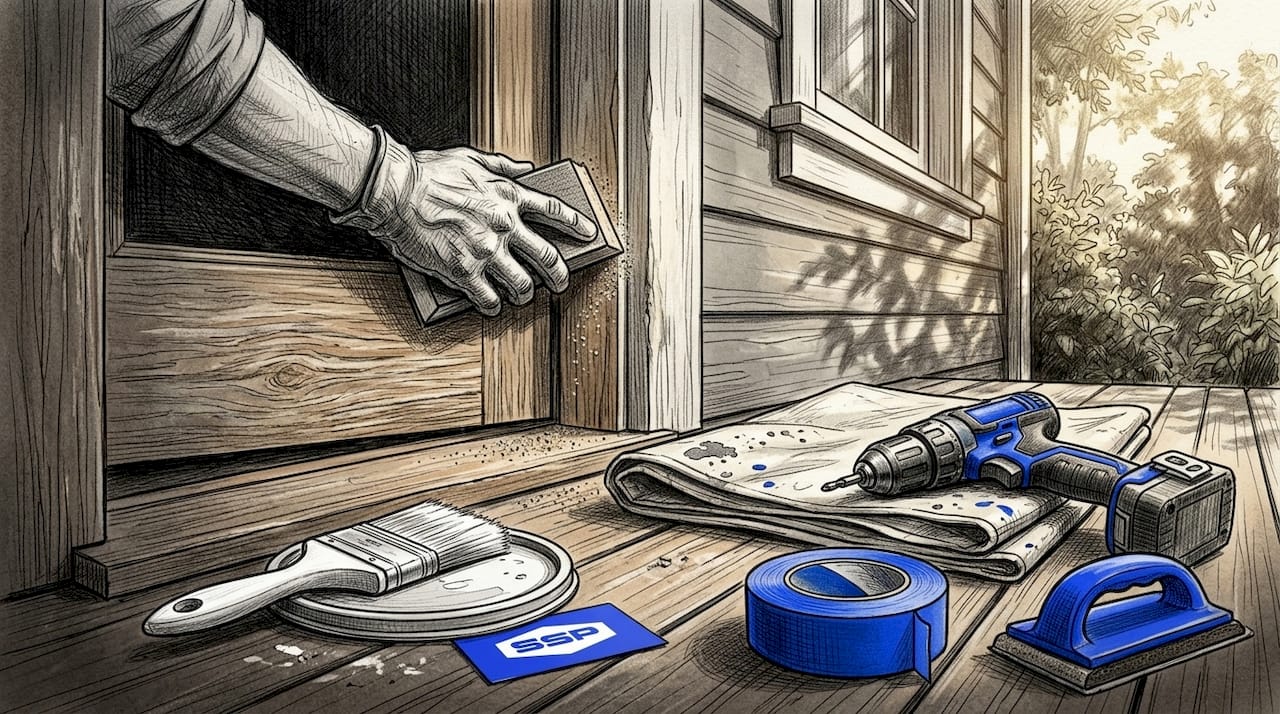
Sand and feather existing paint edges. Feather sanding the edges of remaining paint smooths the transition between old and bare surfaces, reducing the ridge that would otherwise telegraph through new coats. Use 80 to 120 grit sandpaper on wood surfaces and wipe clean before priming.
-
Apply stain-blocking primer to bare areas. Any bare wood, repaired spots, or stained surfaces need a dedicated primer coat before topcoat application. Oil-based or shellac primers work best on wood trim and tannin-rich species like cedar or redwood, which are common in South Bay construction.
Pro Tip: Prime the same day you finish sanding. Bare wood left exposed overnight can absorb ambient moisture, especially near the coast, which compromises primer adhesion the next morning.
How do professional interior painting techniques improve finish quality?
Interior painting technique separates a smooth, lasting finish from a patchy result that shows brush marks and lap lines within a year. Many amateur painting flaws come from poor workflow rather than low-quality paint. The sequence and method matter as much as the product.
Start by preparing the walls thoroughly:
- Wash walls with a mild detergent solution to remove grease, dust, and residue. Kitchen and bathroom walls accumulate oils that prevent paint adhesion even when surfaces look clean.
- Fill cracks and holes with lightweight spackling compound, allow to dry, then sand flush with 120 grit paper. Feather the edges so the repair blends into the surrounding wall.
- Apply painter's tape along trim, baseboards, and ceiling lines before cutting in. Press the tape edge firmly to prevent bleed-through.
For the painting itself, use angled sash brushes to cut in along edges in 3 to 4 foot sections. Cutting in and rolling in small sections while edges remain wet prevents the lap marks that form when paint dries before the adjacent roller pass connects. This wet-edge technique is the most commonly skipped step in DIY interior work.
Roll paint in overlapping W or M patterns to distribute product evenly before filling in with vertical strokes. The nap thickness on your roller should match the surface texture. Smooth drywall takes a 3/8 inch nap, while textured walls need a 1/2 to 3/4 inch nap for full coverage in recessed areas.
Primer selection for interior walls follows the surface condition. New drywall needs a PVA drywall primer to seal the paper face. Stained or previously glossy surfaces require a stain-blocking primer to prevent bleed-through and improve topcoat adhesion. Allow primer to dry fully, typically two to four hours for latex primers, before applying the first topcoat.
Pro Tip: When painting interior walls for lasting, pro results, always apply two topcoats even when the first coat looks complete. Single-coat coverage almost always shows unevenness under raking light.
What materials and tools does every painting project require?
Selecting the right tools and materials before starting prevents mid-project delays and quality compromises. The table below covers the core items for both interior and exterior work.
| Tool or Material | Purpose | Notes |
|---|---|---|
| Pressure washer | Exterior surface cleaning | 1,500 to 2,500 PSI for most residential siding |
| Angled sash brush (2.5 inch) | Cutting in edges and trim | Synthetic bristles for latex paint |
| 3/8 to 3/4 inch nap roller | Wall and siding coverage | Match nap to surface texture |
| Stain-blocking primer | Bare wood, stains, repairs | Oil-based or shellac for tannin-rich wood |
| Caulk gun with exterior caulk | Sealing gaps and seams | Paintable, flexible formula |
| Painter's tape | Protecting trim and fixtures | Remove while paint is still slightly tacky |
| Drop cloths (canvas) | Floor and furniture protection | Canvas grips better than plastic on floors |
| Extension pole | Roller reach on high walls | Reduces fatigue and improves consistency |
| Paint sprayer | Large exterior surfaces | Use with backrolling for best coverage |
| Plastic sheeting | Protecting landscaping and fixtures | Secure with tape before pressure washing |
Latex paint is the standard choice for most South Bay residential exteriors because it handles temperature fluctuation well, dries faster, and cleans up with water. Oil-based paints offer superior adhesion on bare metal and high-traffic trim but require mineral spirits for cleanup and take longer to cure. For interior walls, eggshell and satin finishes balance washability with a low-sheen appearance that suits living areas. Semi-gloss works best in kitchens, bathrooms, and on trim where moisture resistance and durability matter most.
How to apply paint and finishes for maximum longevity
Applying paint correctly after thorough prep is what converts good preparation into a finish that holds up for years. The application sequence for exterior work follows a top-to-bottom logic that prevents drips from landing on finished surfaces.
-
Start at the top. Begin with fascia boards, soffits, and gable ends before moving to siding. Gravity pulls drips downward, so working from the top protects areas you have already painted.
-
Spray and backroll on large exterior surfaces. Combining sprayers with immediate backrolling produces uniform coverage and eliminates texture inconsistencies that spraying alone leaves behind. One person sprays while a second follows immediately with a roller in the same section.
-
Apply two coats with adequate drying time between them. Most exterior latex paints require four to six hours between coats under normal South Bay conditions. Applying a second coat too soon traps solvents and causes wrinkling or soft spots in the finish.
-
Cut in trim and windows last. Painting trim after siding allows you to correct any overspray or roller splatter cleanly. Use a steady hand with a 2.5 inch angled brush and work in long, smooth strokes.
-
Choose sheen levels by location. Flat or matte finishes hide surface imperfections on siding but are harder to clean. Satin and semi-gloss finishes on trim and doors resist moisture and scuffing. Interior flat paint works on ceilings, eggshell on walls, and semi-gloss on trim and cabinetry.
-
Remove tape and coverings promptly. Pull painter's tape at a 45-degree angle while the paint is still slightly tacky, not fully cured. Waiting too long causes the tape to bond to the surface and pull paint with it when removed.
Pro Tip: Inspect finished surfaces under raking light from a flashlight held at a low angle before calling the job complete. This reveals thin spots, roller texture, and missed areas that look fine under normal lighting.
What maintenance steps preserve paint quality over time?
Regular maintenance extends paint lifespan and prevents small problems from becoming expensive repairs. South Bay properties face specific challenges including marine air, salt exposure, and UV intensity that accelerate paint degradation faster than inland climates.
Effective maintenance includes these practices:
- Wash exterior surfaces annually. Use a garden hose or low-pressure washer with a mild detergent to remove salt deposits, mildew, and airborne pollutants. Avoid abrasive scrubbing that removes paint film.
- Inspect for peeling, cracking, and chalking each year. Chalking, the powdery residue that forms on aged paint, signals that the binder has broken down and repainting is approaching. Catching it early prevents moisture intrusion into the substrate.
- Address caulk failures immediately. Caulk around windows and trim shrinks and cracks over time. Recaulking before water infiltrates prevents wood rot that requires costly repairs before the next paint cycle.
- Touch up bare spots within the same season. Exposed wood or substrate left unprotected absorbs moisture rapidly, especially in coastal environments. A spot prime and topcoat applied promptly prevents the damage from spreading.
- Plan repainting cycles proactively. Quality exterior paint on a well-prepared South Bay home typically lasts seven to ten years. Tracking the original paint date and scheduling inspections at the five-year mark keeps you ahead of failure rather than reacting to it.
Interior paint maintenance is simpler. Wipe walls with a damp cloth and mild cleaner as needed, and touch up scuffs before they grow. High-traffic areas like hallways and stairwells benefit from satin or semi-gloss finishes that withstand repeated cleaning without dulling.
Key takeaways
A durable paint job requires thorough surface preparation, correct primer selection, and disciplined application technique applied in the right sequence.
| Point | Details |
|---|---|
| Prep determines durability | Nearly 90% of exterior paint failures stem from inadequate surface preparation before painting. |
| Temperature and timing matter | Paint during 50 to 80°F dry conditions to maximize adhesion and curing quality. |
| Wet-edge technique prevents lap marks | Cut in and roll in 3 to 4 foot sections while edges stay wet for a seamless finish. |
| Match primer to surface condition | Use stain-blocking or shellac primers on bare wood, stains, and previously glossy surfaces. |
| Annual maintenance extends paint life | Yearly washing, caulk inspection, and prompt touch-ups protect surfaces between full repaints. |
What I've learned from years of South Bay painting projects
After working on properties across the South Bay, the pattern I see most consistently is this: homeowners who invest heavily in prep rarely call back with problems, and homeowners who rush to the painting stage almost always do. The preparation phase feels unproductive because nothing looks different when you finish it. You have cleaned, sanded, caulked, and primed, and the house looks roughly the same as when you started. That psychological barrier causes more paint failures than any product deficiency.
Weather is the other factor that catches people off guard. The South Bay's marine layer and salt air create conditions that punish shortcuts. I have seen paint applied on a warm afternoon fail within a season because the surface held residual moisture from morning fog that nobody checked for. A simple moisture meter, available at any hardware store, takes the guesswork out of that decision entirely.
The tool I would never skip is the angled sash brush for cutting in. Generic flat brushes leave ragged edges that no amount of careful rolling corrects. The right brush, combined with patience at the edges, is what separates a finish that looks professional from one that looks close enough.
For large or complex projects, the honest recommendation is to bring in a professional crew. Not because the process is beyond a motivated homeowner, but because the physical demands of a full exterior repaint, working at height, managing spray equipment, and maintaining consistent technique across hundreds of square feet, compound quickly. The South Bay exterior painting workflow is manageable when you understand each stage, but it rewards experience and proper equipment.
— Ryan
Get professional painting results for your South Bay property

Southshorepaint specializes in residential and commercial painting across the South Bay, with crews who understand local climate conditions, coastal surface challenges, and the prep standards that make paint jobs last. Every project starts with a thorough surface assessment, premium materials selected for the specific substrate and exposure, and workmanship backed by real accountability. Whether you are managing a rental portfolio or refreshing a single-family home, Southshorepaint delivers finishes built to hold up, not just look good on day one. Schedule a free estimate and get expert guidance on the right approach for your property before the next painting season arrives.
FAQ
What are the main steps in the property painting process?
The property painting process covers surface cleaning, damage repair, caulking, priming, paint application, and post-job cleanup. Following this sequence in order is what separates a durable finish from one that fails prematurely.
How long should I wait between primer and topcoat?
Latex primers typically require two to four hours of drying time before applying a topcoat, though oil-based and shellac primers may need up to 24 hours. Always check the manufacturer's label for the specific product you are using.
What exterior painting tips apply specifically to South Bay properties?
South Bay homes benefit from scheduling exterior painting during dry, mild weather to counter marine layer humidity, using stain-blocking primers on any wood trim exposed to salt air, and washing surfaces annually to remove salt and mildew buildup. These steps directly address the climate factors that shorten paint life in coastal environments.
How often should exterior paint be reapplied?
Quality exterior paint on a properly prepared South Bay home typically lasts seven to ten years. Annual inspections at the five-year mark help identify early signs of chalking, peeling, or caulk failure before they require full-scale repairs.
Does primer always need to be applied before painting?
Primer is required on bare wood, repaired surfaces, stained areas, and previously glossy finishes. Skipping primer on these surfaces causes poor adhesion and allows stains to bleed through topcoats, which shortens the life of the entire paint job.