
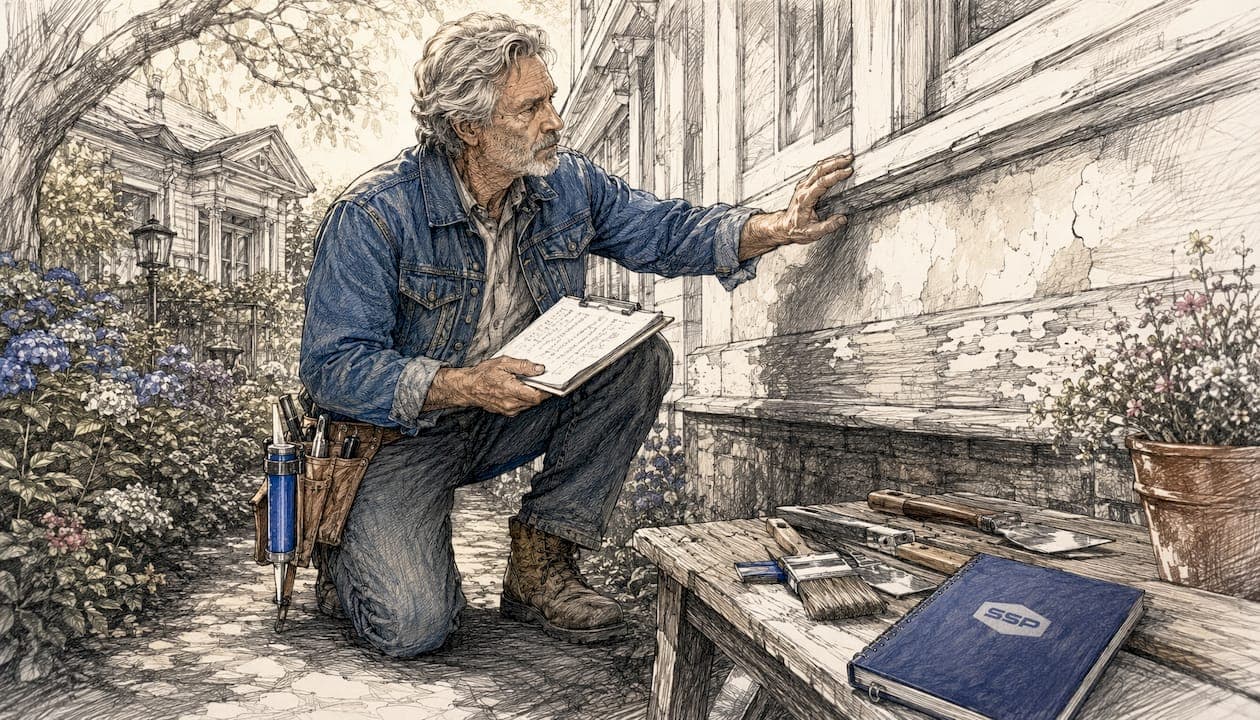
Repairs are the foundation of any lasting paint job. Without addressing cracks, rust, moisture damage, and deteriorating surfaces before painting, even premium coatings fail prematurely, leaving property owners with accelerated deterioration and far more expensive remediation down the road. The role of repairs in painting maintenance is not cosmetic preparation. It is structural protection. Patching voids, sealing joints, removing rust, and stabilizing surfaces before applying paint prevents moisture intrusion, stops rot from spreading, and gives coatings the adhesion they need to perform for years rather than months.
Key benefits and tasks that repairs deliver within a painting maintenance program:
- Surface stabilization: Filling cracks and voids eliminates entry points for water and contaminants.
- Adhesion improvement: Clean, repaired surfaces allow paint to bond properly, extending coating life.
- Moisture control: Sealing joints and damaged areas stops water infiltration before it causes structural rot.
- Rust mitigation: Removing corrosion and applying rust-inhibiting primers protects metal substrates.
- Cost reduction: Addressing minor damage early prevents the compounding expense of deferred repairs.
- Warranty protection: Documented repairs and surface preparation keep manufacturer coating warranties valid.
- Property value retention: Well-maintained painted surfaces preserve curb appeal and market value.
Table of Contents
- What is the role of repairs in painting maintenance?
- How repairs save money over the life of a property
- How to schedule and structure a maintenance painting program
- 1. Crack and void patching
- 2. Joint and sealant repair
- 3. Rust removal and metal surface treatment
- 4. Mold and mildew remediation
- 5. Peeling and delaminating paint removal
- 6. Wood rot repair and consolidation
- 7. Masonry spalling and surface consolidation
- 8. Water damage and stain treatment
- 9. Caulking and weatherproofing gaps
- 10. Impact damage and surface restoration
- Expert insights from Southshorepaint on repair and maintenance practices
- Key Takeaways
- Why most property owners get painting maintenance wrong
- Southshorepaint delivers painting maintenance built to last
What is the role of repairs in painting maintenance?
Maintenance painting is the scheduled repainting and surface care that keeps a building's protective coating system functioning over time. It is not a one-time project. It is an ongoing program designed to preserve the condition of exterior and interior surfaces, protect underlying materials, and extend the service life of the structure itself.
Repairs are the preparatory work that restores surface integrity before any new coating goes on. Without that restoration, paint applied over damaged substrates will blister, peel, or crack within a fraction of its expected lifespan. The repair step is what separates a maintenance paint job that lasts from one that fails early.
The most common repair techniques embedded in a maintenance painting program include:
- Crack filling: Injecting or troweling patching compound into hairline and structural cracks to restore surface continuity.
- Joint sealing: Applying fresh caulk or elastomeric sealant at expansion joints, window frames, and penetrations to block water entry.
- Surface cleaning: Pressure washing, wire brushing, or chemical cleaning to remove dirt, mold, mildew, and loose paint before repairs begin.
- Sanding and feathering: Smoothing repaired areas and existing paint edges so new coatings lay flat without visible ridges.
- Rust removal and priming: Grinding or chemically treating corroded metal, then applying a rust-inhibiting primer before topcoating.
- Substrate consolidation: Stabilizing soft, spalled, or delaminating masonry with penetrating consolidants before patching.
Each of these techniques directly supports paint adhesion, durability, and the coating's ability to protect the substrate beneath it. Skipping any one of them creates a weak point that moisture, UV exposure, and thermal cycling will exploit.
How repairs save money over the life of a property
Proactive maintenance painting with integrated repairs prevents the kind of structural rot and coating failures that turn a manageable maintenance budget into a capital expenditure. Proactive maintenance with regular sealant and coating inspections reduces structural rot and the costly repairs that follow for commercial properties.
The financial logic is straightforward. A small crack left unsealed allows water to penetrate the substrate. Over one or two freeze-thaw cycles, that crack widens. Moisture reaches the framing or masonry beneath the coating. Rot or spalling begins. What started as a $50 caulking repair becomes a substrate replacement project costing many times more.
Painting by itself is generally a deductible repair that maintains property condition under IRS guidelines, provided it is not part of a capital improvement project. Routine patching and sealing cracks are also deductible repair expenses when they keep property in ordinary operating condition. That immediate deductibility is a real financial advantage over capitalized improvements, which must be depreciated over 27.5 years for residential rental property or 39 years for commercial property.
Statistic callout: The IRS BAR Test (Betterment, Adaptation, Restoration) determines whether painting and repair costs are immediately deductible or must be capitalized. Repairs that restore property to its prior condition without adding value or extending useful life qualify for immediate deduction, giving property owners a direct cash-flow benefit in the year the work is performed.
Facility managers who treat painting as an asset-protection program rather than a cosmetic purchase consistently achieve longer coating service lives and lower total cost of ownership. Evaluating proposals on service life, maintenance requirements, and warranty coverage rather than bid price alone is the approach that protects the budget over a five-to-ten-year horizon.
How to schedule and structure a maintenance painting program
Effective maintenance painting does not happen reactively. It follows a documented cycle that combines regular inspections, timely repairs, and scheduled recoating before coatings reach the point of failure.
Inspection and scheduling best practices:
- Conduct annual visual inspections of all coated surfaces, both interior and exterior.
- Perform quarterly cleaning of exterior walls to remove contaminants that accelerate coating degradation.
- Evaluate exterior systems each year for chalking, cracking, fading, sealant failure, and signs of moisture intrusion.
- Schedule interior repainting based on traffic levels, occupancy type, and brand or facility standards.
- Address abrasions, rust spots, and impact damage promptly rather than waiting for the next scheduled cycle.
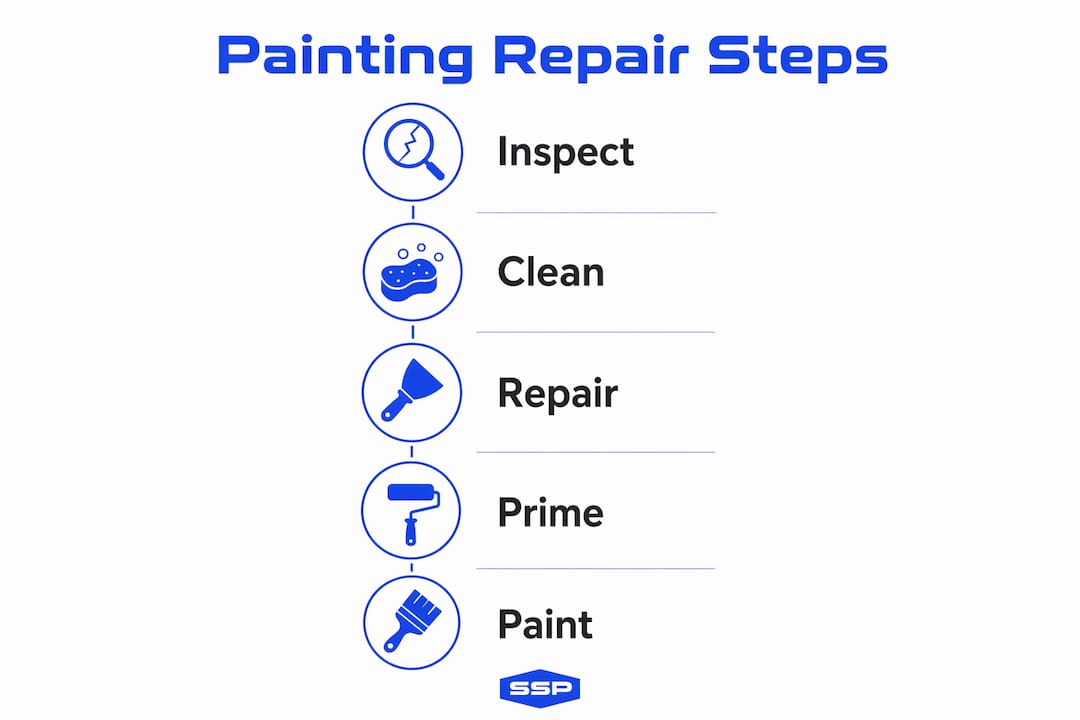
The sequential workflow from assessment to finished coating:
- Condition assessment: Walk the property and document all surface defects, including cracks, rust, peeling paint, mold, and sealant failure. Photograph each issue.
- Scope definition: Write a clear repair scope that identifies every defect, the repair method, and the materials required.
- Surface cleaning: Pressure wash or chemically clean all surfaces to remove contaminants before repairs begin.
- Repairs: Execute patching, crack filling, rust treatment, joint sealing, and substrate consolidation in the order that allows each repair to cure before the next step.
- Priming: Apply appropriate primers to repaired areas and any bare substrate exposed during repairs.
- Coating application: Apply finish coats only after repairs are fully cured and primed surfaces have been inspected.
- Documentation: Record all materials used, batch numbers, repair descriptions, and photographic evidence for warranty and tax purposes.
Maintaining proper documentation of painting repairs, including logs, photos, and materials, protects warranty validity and supports accurate tax reporting. That record-keeping discipline is what separates a professionally managed maintenance program from a series of disconnected paint jobs.
Pro Tip: Build a repair log that captures the date, location, defect type, repair method, and materials for every intervention. This log becomes your warranty evidence, your tax documentation, and your planning tool for future maintenance cycles, all in one place.
1. Crack and void patching
Cracks are the most common repair target in any maintenance painting program, and they are also the most consequential if ignored. Hairline cracks in stucco, drywall, or masonry allow moisture to migrate behind the coating, where it causes blistering, delamination, and eventually substrate damage. Neglecting repairs before painting leads to premature paint failure, increased moisture infiltration, and accelerated structural decay.
The standard repair approach uses a flexible patching compound for interior surfaces and an elastomeric filler for exterior masonry or stucco, where thermal movement requires a material that can flex without re-cracking. After the patch cures, the area is sanded smooth and feathered into the surrounding surface before priming.
2. Joint and sealant repair
Sealant at window frames, door frames, expansion joints, and penetrations is the first line of defense against water intrusion. When sealant ages, it shrinks, cracks, or pulls away from the substrate, creating gaps that channel water directly behind the coating system. Replacing failed sealant before repainting is one of the highest-return repairs in any maintenance program.
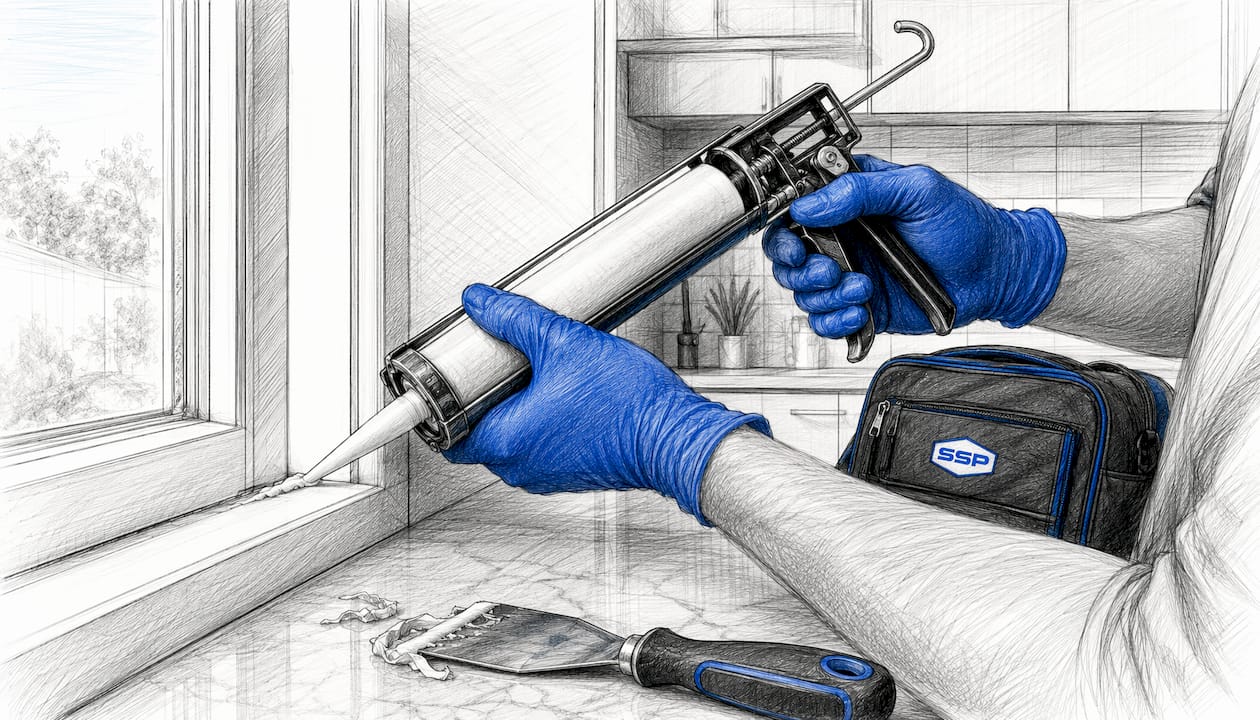
The correct process involves removing all old sealant completely, cleaning the joint, and applying a fresh backer rod and sealant rated for the substrate and exposure conditions. Painting over deteriorated sealant without replacing it is a common shortcut that guarantees early coating failure at every joint.
3. Rust removal and metal surface treatment
Corrosion on metal substrates, whether structural steel, railings, window frames, or flashing, must be fully addressed before any coating is applied. Painting over active rust traps moisture beneath the coating and accelerates the corrosion it was meant to stop. The rust continues to expand, lifting the coating from beneath and creating the characteristic blistering pattern that signals a failed metal paint job.
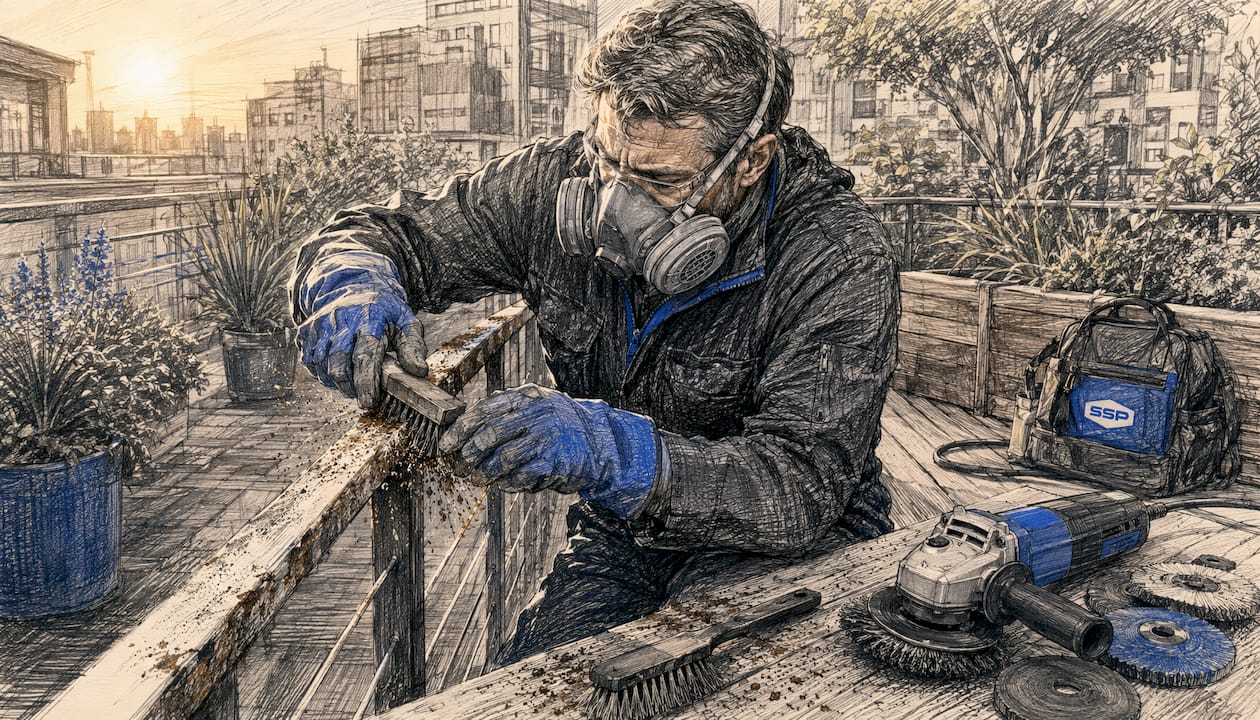
Effective rust treatment involves mechanical removal by grinding, wire brushing, or abrasive blasting to bare metal, followed immediately by a rust-inhibiting primer. For surfaces where abrasive blasting is not practical, chemical rust converters can stabilize minor corrosion before priming. The exterior prep process for metal surfaces requires this sequence without exception.
4. Mold and mildew remediation
Mold and mildew on painted surfaces are not just aesthetic problems. They indicate moisture conditions that will continue to degrade the substrate and the coating unless the source is addressed. Painting over mold without treating it first allows the growth to continue beneath the new coating, which will eventually blister and peel as the biological activity continues.
Proper remediation involves cleaning the affected area with a mildewcide solution, allowing it to dry completely, and then identifying and correcting the moisture source before painting. On exterior surfaces, this often means improving drainage, repairing gutters, or addressing grading issues that direct water toward the building.
5. Peeling and delaminating paint removal
Peeling paint is a symptom, not just a surface defect. It indicates that adhesion has failed, usually because of moisture, contamination, or an incompatible previous coating. Applying new paint over peeling areas without removing the loose material guarantees that the new coating will peel along with the old one.
The repair process requires scraping all loose and peeling paint back to a firmly adhered layer, feathering the edges with sandpaper, and priming bare areas before recoating. On surfaces with extensive delamination, a full strip-to-bare-substrate approach may be necessary to achieve a stable base. Understanding moisture's role in exterior painting is critical to diagnosing why peeling occurred and preventing recurrence.
6. Wood rot repair and consolidation
Rot in wood substrates is one of the more serious repair challenges in exterior painting maintenance. Once wood fibers break down, the substrate can no longer hold fasteners or support a coating film. Left unaddressed, rot spreads to adjacent framing and eventually compromises structural integrity.
For localized rot, epoxy consolidants and fillers allow the damaged area to be stabilized and rebuilt without full replacement. The consolidant penetrates the softened wood, hardens it, and creates a stable base for the epoxy filler. After curing and sanding, the repaired area accepts primer and paint like sound wood. Larger areas of rot require replacement of the damaged material before painting can proceed.
7. Masonry spalling and surface consolidation
Spalled masonry, where the surface layer of brick, concrete, or stucco has broken away, creates an uneven substrate that paint cannot bridge effectively. Water that enters spalled areas freezes and expands in cold climates, accelerating the damage with each freeze-thaw cycle.
Repair involves removing all loose material, cleaning the area, and applying a compatible patching mortar or masonry filler. For surfaces with widespread surface deterioration, a penetrating consolidant applied before patching can stabilize the substrate and improve the bond of the repair material. Proper surface prep and priming on masonry is what determines whether the repair holds for years or fails in the first winter.
8. Water damage and stain treatment
Water stains on interior surfaces indicate a past or ongoing moisture problem. Painting over them without sealing the stain first allows tannins and minerals to bleed through the new coating, producing discoloration that reappears within weeks. More critically, if the moisture source is still active, the new coating will fail regardless of how well the surface was prepared.
The repair sequence requires identifying and correcting the moisture source, allowing the substrate to dry completely, and then applying a stain-blocking primer before finish coating. Shellac-based primers like Zinsser BIN and oil-based stain blockers are the most reliable options for heavy staining or water damage.
9. Caulking and weatherproofing gaps
Gaps around pipes, conduit, vents, and other penetrations through exterior walls are common entry points for both moisture and pests. These gaps are often overlooked during routine painting because they fall outside the main painted surface area, but they represent a direct path for water to reach the building envelope.
Sealing every penetration with an appropriate exterior-grade caulk or foam sealant before painting is a standard part of a thorough exterior prep process. The sealant should be compatible with the finish coating and rated for the temperature range and UV exposure at the specific location. For guidance on preparing exterior walls completely, the exterior wall prep process covers the full sequence from cleaning through sealing.
10. Impact damage and surface restoration
Dents, gouges, and impact damage on drywall, wood trim, and metal surfaces create surface irregularities that telegraph through paint, especially with sheen levels above flat. They also create stress concentrations where coatings tend to crack and peel over time.
Repairing impact damage before painting involves filling with an appropriate patching compound, sanding flush, and priming. On metal surfaces, straightening deformed areas before filling prevents the filler from cracking as the metal flexes. The goal is a surface that is flat, stable, and uniformly primed before any finish coat is applied.
Expert insights from Southshorepaint on repair and maintenance practices
Facility managers often underestimate painting's preventive role. A repair-focused strategy extends paint life and protects assets in ways that a purely cosmetic approach never achieves. The difference shows up not in how a building looks the week after painting, but in how it holds up three and five years later.
Maintaining manufacturer warranties requires documented, scheduled repairs integrated with painting maintenance. Most coating warranties specify surface preparation standards, application conditions, and ongoing maintenance requirements. Without evidence that those requirements were met, warranty claims are routinely denied.
Pro Tip: Document paint batch numbers, repair descriptions, and photographic records for every maintenance cycle. This documentation supports both warranty claims and IRS tax classification, protecting your investment from two directions simultaneously.
Professional techniques Southshorepaint applies when integrating repairs into maintenance painting:
- Conduct a written condition assessment before every project, not just a visual walk-through.
- Specify repair materials by product name and formulation, not generic category, to ensure compatibility with the finish coating.
- Allow all repairs to cure fully before priming. Rushing this step is one of the most common causes of early coating failure.
- Apply a spot prime to every repaired area before the full prime coat, creating a uniform base that prevents flashing in the finish.
- Inspect repaired areas under raking light before painting to catch any surface irregularities that would telegraph through the finish.
- Keep a photographic record of before and after conditions for every repair, organized by location and date.
Key Takeaways
Repairs are not optional preparation for painting. They are the structural foundation that determines whether a coating system protects a property for years or fails within months.
| Point | Details |
|---|---|
| Repairs prevent coating failure | Addressing cracks, rust, and moisture damage before painting stops premature peeling and delamination. |
| Proactive maintenance saves money | Fixing minor defects early prevents the compounding cost of deferred structural repairs. |
| Documentation protects your investment | Repair logs with photos and batch numbers support warranty claims and IRS deductibility. |
| Scheduling drives results | Annual inspections with prompt repairs between cycles extend coating service life significantly. |
| Southshorepaint integrates repairs into every project | Southshorepaint builds written condition assessments, documented repairs, and proper surface prep into every maintenance painting program. |
Why most property owners get painting maintenance wrong
The conventional view of painting is that it is a cosmetic service. You paint when things look worn, when a tenant moves out, or when you are preparing a property for sale. That framing misses the point entirely, and it is the reason so many properties end up with recurring paint failures, escalating repair costs, and coating systems that never seem to last as long as they should.
Painting is a protective system. The coating is the barrier between the building envelope and everything that degrades it: moisture, UV radiation, thermal cycling, biological growth, and physical impact. When that barrier fails, the substrate beneath it begins to deteriorate. The painting was never just about appearance. It was about keeping water out of the wall assembly, keeping corrosion off the steel, and keeping rot out of the wood.
The repair step is where that protective function is either established or undermined. A coating applied over a sound, properly prepared surface will perform close to its rated service life. The same coating applied over unaddressed cracks, active rust, or failed sealant will fail in a fraction of that time, regardless of the coating's quality or the painter's skill. The substrate condition is the variable that matters most, and repairs are how you control it.
What property owners and facility managers consistently underestimate is the compounding nature of deferred maintenance. A crack ignored this year is a larger crack next year, a moisture problem the year after, and a substrate replacement project within five years. The cost curve is not linear. It accelerates. Addressing defects at the repair stage, before painting, is always the least expensive intervention point in that curve.
The most effective maintenance programs treat painting and repairs as a single integrated activity, not two separate line items. Inspection, repair, and coating happen in sequence, on a documented schedule, with records that support both warranty claims and tax treatment. That is the approach Southshorepaint brings to every project, and it is the approach that produces results property owners can measure in years of service life rather than months.
Southshorepaint delivers painting maintenance built to last
Skipping repairs to save money on a paint job is the most expensive decision a property owner can make. The coating fails early, the substrate deteriorates faster, and the next project costs more than the original repair and painting combined would have.

Southshorepaint approaches every residential and commercial project as a protection program, not a paint application. That means a written condition assessment before any work begins, documented repairs using materials specified for the substrate and exposure, proper priming of every repaired surface, and finish coatings applied to a standard that holds up under real conditions. The result is a paint job that protects your property for years, not one that looks good for a season.
If your property is showing signs of coating failure, surface damage, or deferred maintenance, the right time to address it is before the next coat of paint goes on. Get a professional assessment from Southshorepaint and find out exactly what your surfaces need to perform the way they should.