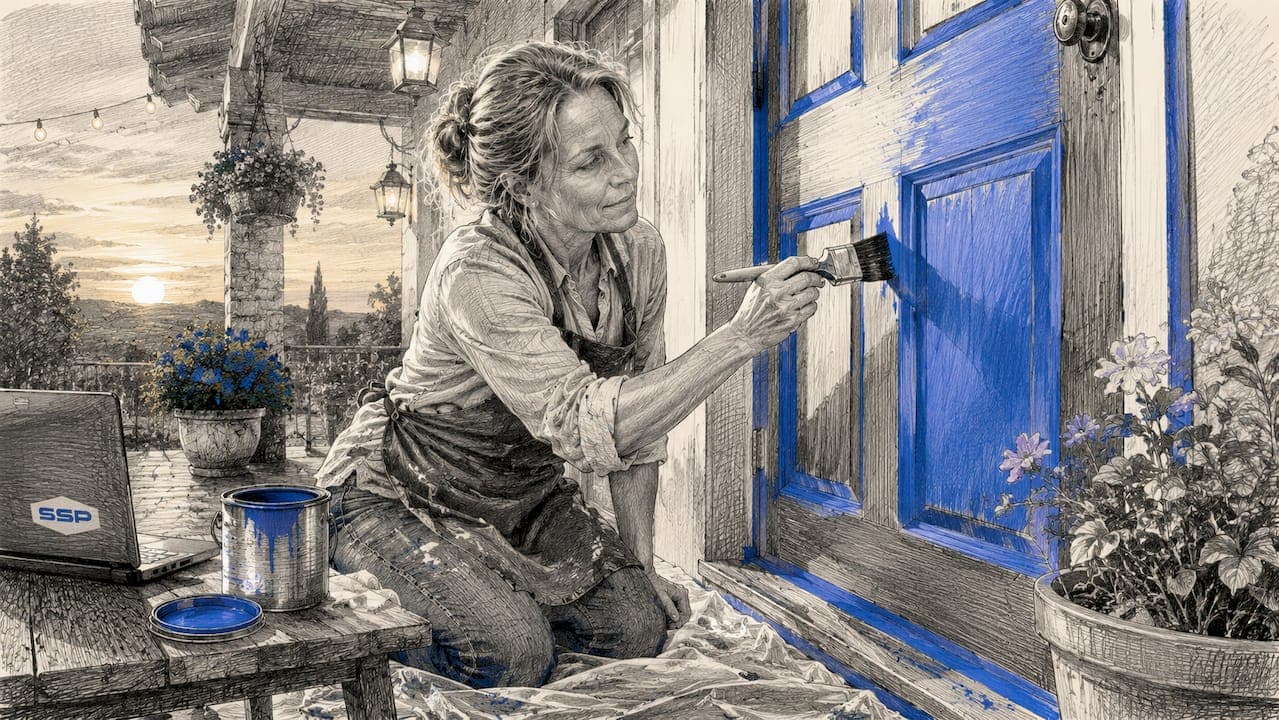
Painting exterior doors is the process of applying primer and finish coats to an entry or garage door to protect the surface and improve curb appeal. A professional result depends on four factors: proper surface preparation, the right paint type, correct tool selection, and a disciplined painting sequence. Optimal painting conditions fall between 50 and 85°F with low humidity, and skipping those conditions is the single most common reason a DIY paint job fails within a season. This guide walks you through every step, from gathering supplies to final curing, so you get a finish that lasts.
What tools and materials do you need to paint exterior doors?
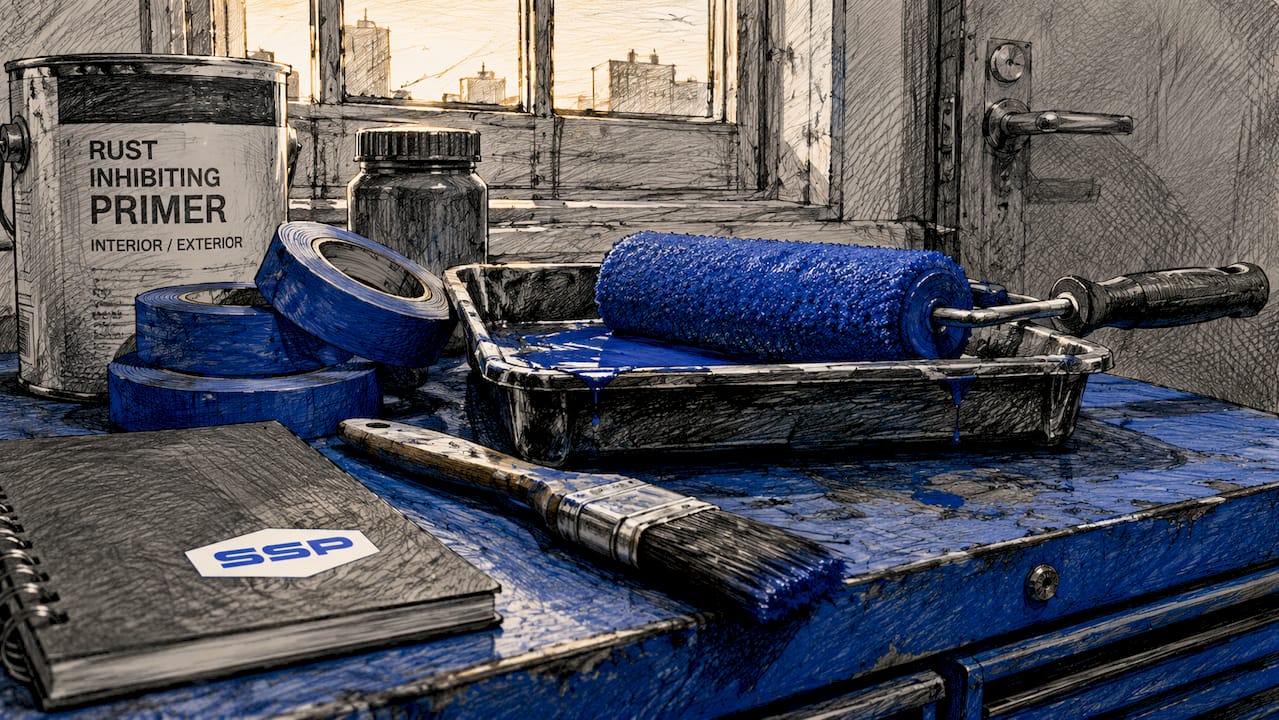
The right supplies make the difference between a finish that peels in six months and one that holds for years. Gather everything before you start so you are not stopping mid-coat to run to the hardware store.
Essential supplies:
- Primer: Use a bonding primer for steel doors and a wood-specific primer for solid wood. Fiberglass doors accept most exterior acrylic primers.
- Exterior acrylic latex paint: This is the industry standard for exterior doors. It resists moisture, UV rays, and temperature swings better than oil-based alternatives.
- Angled brush (2.5 inch): Cuts clean lines on edges, molding profiles, and recessed panels.
- Foam roller (4 inch): Leaves a smooth, mark-free surface on flat panels.
- 220-grit sandpaper or scuff pads: Creates surface tooth for paint adhesion.
- Painter's tape (high-adhesion): Masks glass, hardware, and weatherstripping.
- Drop cloths: Protects the threshold and surrounding floor.
- Safety gear: Nitrile gloves and safety goggles protect skin and eyes from primer and solvent contact.
The choice of primer and paint depends on door material. Steel doors need a rust-inhibiting primer to prevent corrosion under the finish coat. Wood doors require a primer that seals the grain and prevents tannin bleed-through. Fiberglass doors are the most forgiving, but they still need light scuffing and a bonding primer for the paint to grip. Choosing the wrong primer for your door material is a prep mistake that no amount of quality topcoat can fix.
| Tool | Purpose |
|---|---|
| Angled brush | Edges, panels, and detail work |
| Foam roller | Smooth flat surfaces without brush marks |
| 220-grit sandpaper | Surface scuffing for adhesion |
| High-adhesion painter's tape | Masking hardware and glass |
| Bonding primer | Seals surface and promotes topcoat grip |
How to properly prepare the door surface before painting
Surface prep is where lasting paint adhesion is won or lost. A clean, lightly scuffed surface gives the primer something to grip. A dirty or glossy surface causes the paint to separate from the door within months.
-
Remove or mask hardware. Take off the door handle, lockset, knocker, and house numbers if possible. Removing hardware greatly simplifies achieving a clean paint line and reduces the risk of paint binding on hinges. If removal is not practical, apply high-adhesion painter's tape tightly around each piece.
-
Clean the surface. Wash the entire door with a degreasing detergent and warm water. This removes road grime, cooking oils, and airborne residue that prevent primer from bonding. Rinse thoroughly and let the door dry completely before touching it with sandpaper.
-
Sand lightly. Light sanding with 220-grit sandpaper or a scuff pad creates the surface tooth that primer needs, especially on factory finishes and previously painted surfaces. Sand in the direction of the grain on wood doors. Wipe away all dust with a tack cloth before priming.
-
Fill imperfections. Use an exterior-grade wood filler or auto-body filler for steel doors to fill dents, holes, and cracks. Sand the filled areas smooth once dry. Skipping this step leaves visible depressions under the finish coat.
-
Apply primer. Brush primer into recessed panels first, then roll the flat sections. Let the primer dry fully according to the manufacturer's instructions before sanding lightly with 220-grit and wiping clean.
Pro Tip: Never paint in direct sunlight or on a rainy or windy day. Unsuitable weather conditions compromise paint adhesion and finish quality. Choose an overcast morning when temperatures sit between 50 and 85°F.
What is the recommended painting sequence for exterior doors?
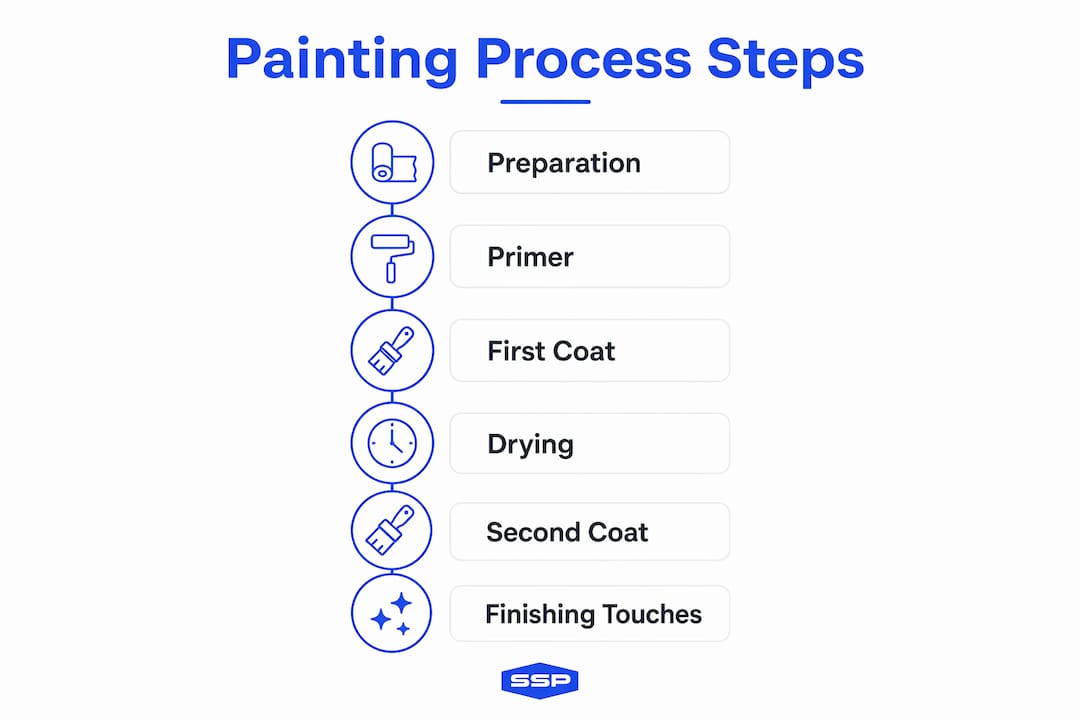
The painting sequence controls whether you get lap marks or a smooth, even finish. Most homeowners paint in the wrong order and end up with visible overlap lines where wet paint meets dry.
The correct order for a panel door follows a specific path. Paint recessed panels first, then the center vertical stile, then the horizontal rails, and finally the outer vertical stiles. This sequence keeps wet edges meeting wet edges, which prevents lap marks from forming.
-
Recessed panels: Load your angled brush and work paint into all four edges of each panel. Follow immediately with the foam roller across the flat face of the panel. Work one panel at a time.
-
Center vertical stile: Brush the edges, then roll the flat face from top to bottom in one continuous stroke.
-
Horizontal rails: Paint the top rail first, then the middle, then the bottom. Brush edges and roll flat sections in the same motion.
-
Outer vertical stiles: Finish with the two outer stiles, brushing edges and rolling flat faces top to bottom.
Pro Tip: Apply thin, even coats rather than thick ones. Thick coats sag, drip, and dry unevenly. Two thin coats always outperform one heavy coat.
Doors with windows require extra care. Apply high-adhesion tape to the glass before you start. Paint the wood or steel frame around each pane with an angled brush, keeping strokes tight and controlled. If you are painting a garage door, the same sequence applies: panels first, then rails, then stiles, working section by section across the full width.
For doors still hung on hinges, prop the door open with a wedge and work quickly to maintain a wet edge. Removing the door and laying it flat on sawhorses gives you better control over drips and lets you reach all edges without awkward angles. The flat position also helps the angled brush and foam roller combination deliver a mark-free surface on every panel.
Allow 4–6 hours drying time between coats. Two coats of finish paint over primer is the standard for exterior doors. Three coats are worth considering on doors that face direct sun or heavy weather exposure.
How do you manage drying, curing, and finishing touches?
Drying and curing are two different things, and confusing them causes most post-paint problems. Paint feels dry to the touch in a few hours. Full curing, where the film reaches its maximum hardness and adhesion, takes much longer.
After the final coat, keep the door flat for about 2 hours to allow the paint's leveling agents to flow and self-correct. Then stand the door upright to cure for at least 22 hours. This sequence prevents gravity-induced sags while the paint is still soft and minimizes dust nibs on the surface.
- Avoid direct sunlight during drying. Heat accelerates the surface skin but traps solvents underneath, causing bubbling and poor adhesion.
- Remove painter's tape while the paint is still slightly tacky, not fully dry. Removing tape immediately while paint is tacky prevents peeling and paint edge damage. Waiting until the paint is fully hard causes the tape to pull the film with it.
- Clean paint on glass with a single-edge razor blade held at a low angle. This removes dried paint without scratching the glass. Do not use abrasive pads.
- Test door operation only after the paint has cured for at least 24 hours. Closing a door too soon compresses the soft paint film against the frame and causes sticking.
Pro Tip: Check the door's swing clearance before the paint fully cures. If the door drags on the frame, lightly sand the contact point with 220-grit sandpaper before the film hardens completely.
What common mistakes should homeowners avoid?
Most DIY door paint jobs fail for predictable reasons. Knowing these pitfalls before you start saves time and materials.
- Skipping the cleaning step. Paint applied over a dirty surface will not bond properly, no matter how good the primer is. Degreasing is non-negotiable.
- Sanding too aggressively. On steel doors, deep scratches from coarse sandpaper create channels where rust can develop under the finish coat. Use 220-grit, not 80-grit.
- Applying thick coats. Thick paint sags on vertical surfaces and takes far longer to cure. Thin coats dry faster, level better, and bond more reliably.
- Painting in bad weather. Temperatures below 50°F slow curing and cause the film to remain soft. High humidity traps moisture under the paint. Both conditions shorten the life of the finish.
- Leaving tape on too long. Tape left overnight or until the paint is fully hard tears the film edge when removed. Pull tape at a 45-degree angle while the paint is still slightly tacky.
- Closing the door before curing. The paint film needs at least 24 hours to harden enough to resist contact with the door frame. Closing it too soon causes sticking and surface damage.
Avoiding these six mistakes puts your exterior paint longevity well above the average DIY result.
Key Takeaways
Proper surface preparation, correct painting sequence, and disciplined drying protocols are the three factors that determine whether an exterior door paint job lasts one season or many years.
| Point | Details |
|---|---|
| Prep drives adhesion | Clean with degreaser and sand with 220-grit before any primer touches the door. |
| Sequence prevents lap marks | Paint recessed panels first, then stiles and rails, to keep wet edges meeting wet edges. |
| Thin coats outperform thick ones | Two thin coats over primer deliver a smoother, more durable finish than one heavy coat. |
| Weather conditions matter | Paint between 50 and 85°F with low humidity; avoid direct sun, rain, and wind. |
| Curing takes longer than drying | Keep the door flat for 2 hours after the final coat, then upright for at least 22 hours before closing. |
Why I always remove the hardware first
Every time I skip removing the door hardware to save 10 minutes, I spend 30 minutes cleaning up paint edges that should have been clean from the start. Removing the handle, lockset, and knocker before you pick up a brush is the single highest-return step in the entire process. The lines are sharper, the tape work is simpler, and there is no risk of paint seizing the latch mechanism.
The other thing I have learned is that paint sheen matters more than most homeowners realize. A satin or semi-gloss finish is the right call for exterior doors. It resists moisture, wipes clean easily, and holds its color longer than flat or eggshell. Flat paint on an exterior door looks dated within a year and shows every fingerprint and scuff.
Patience in the drying phase is where most DIYers lose their results. The urge to close the door, reinstall the hardware, and call it done is real. But a door closed too soon against a soft paint film will stick, and pulling it open tears the finish. The role of proper curing in a long-lasting paint job cannot be overstated. Wait the full 24 hours. The finish you get is worth it.
— Ryan
Southshorepaint has the products your door project needs
A well-painted exterior door starts with the right materials. Southshorepaint carries premium exterior acrylic latex paints and bonding primers suited for wood, steel, and fiberglass doors, along with detailed product guidance to help you choose the correct formulation for your surface.

Whether you are refreshing a front entry or tackling garage door painting for the first time, Southshorepaint's product range and expert resources give you the foundation for a finish that holds up to weather, traffic, and time. Browse the full selection at Southshorepaint and get the materials that match your door material, color goal, and local climate.
FAQ
What is the best paint for exterior doors?
Exterior acrylic latex paint in a satin or semi-gloss sheen is the best choice for most exterior doors. It resists moisture and UV exposure better than oil-based paint and cleans up easily.
How long should you wait between coats on an exterior door?
Wait 4–6 hours between coats under optimal conditions of 50–85°F and low humidity. Rushing this step causes the second coat to lift or wrinkle the first.
Can you paint an exterior door without removing it?
Yes, but propping it open with a wedge and working quickly to maintain a wet edge is required. Removing the door and laying it flat on sawhorses gives better control and a smoother finish.
How do you paint an exterior door with windows?
Apply high-adhesion painter's tape to the glass before painting. Use an angled brush to cut in around each pane, keeping strokes tight. Remove tape while the paint is still slightly tacky to get a clean edge.
How often should you repaint an exterior door?
Most exterior doors need repainting every 3–5 years, depending on sun exposure, climate, and paint quality. Signs that a repaint is due include fading, chalking, or peeling at the edges.